
One of the many things Microsoft has added to its latest version of Word, is enhanced graphics capabilities. In some cases, they are strong enough to preclude many users from turning to third party products such as Photoshop to enhance photographs and other images. Microsoft has clearly been listening to its user community as the ability to alter images directly in Word has been a long awaited feature.
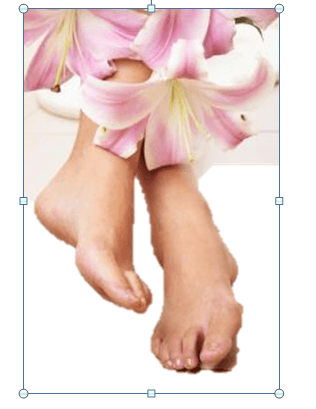
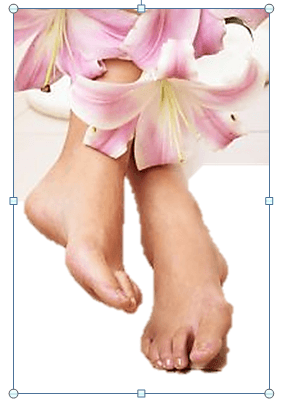
Virtually all of Word’s new graphics features start with the insertion of a graphic into a Word document. To do so, first find a suitable graphic image that you’d like to work with and that might benefit from some graphic enhancement techniques. Below is one example retrieved from stock.xchng:
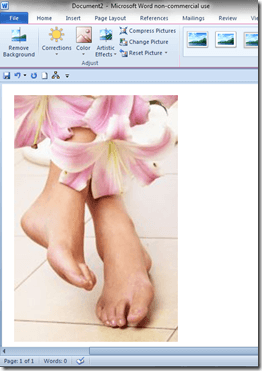
Note: Be sure to notice how when a picture or graphic is inserted into a document, the Picture Tools Ribbon is automatically displayed. All of the new Word 2010 graphics features appear on this ribbon.
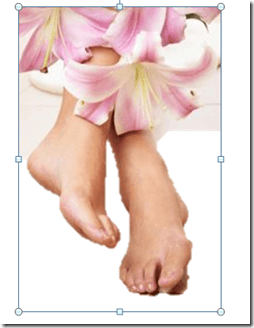
One thing you might want to do first is remove the background as described in another post: How to Use Word 2010 Remove Background Tool.
This gives us:
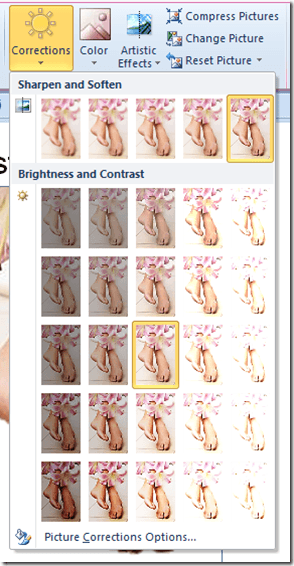
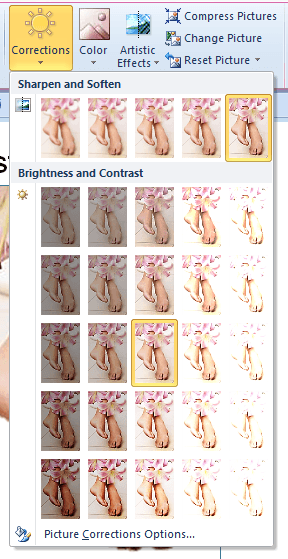
Moving across the Picture Tools menu, the next thing we might want to try is Corrections. This feature allows you to sharpen or soften images or adjust the brightness and contrast. Move your mouse over each image to get a preview of what the effect will do to your image. When you’re ready to pick one, simply click on it.
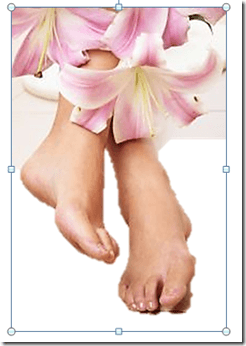
Choosing to make our image a little sharper, we get:
Next up is the Color icon, its purpose is to add saturation, tone or tints. Clicking on it gives this dropdown menu:
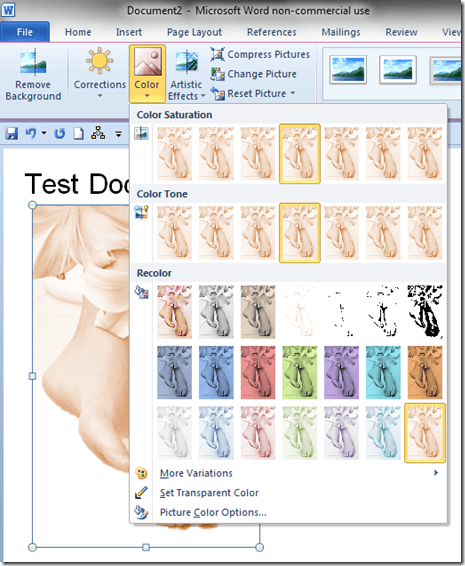
Again, first slide your mouse over the previews until you find one you like, then click.
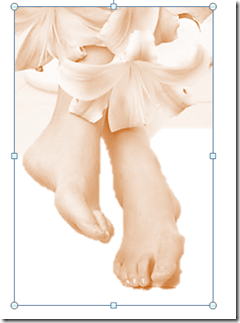
Here’s what our image looks like after adding some color tone:
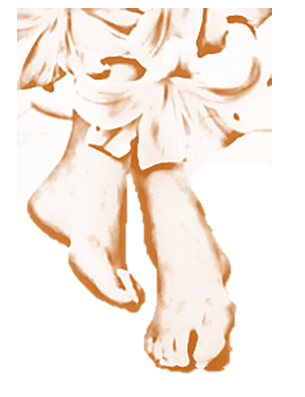
Continuing to move to the right along the Picture Tools menu, is the Artistic Effects icon. Its purpose is to distort the selected image in artistic ways. The dropdown for it looks like this:
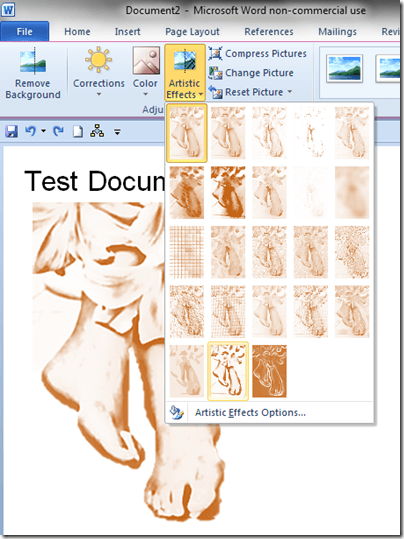
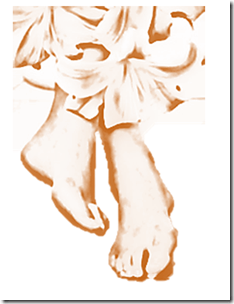
This is what our sample looks like after applying the Photo Copy Effect:
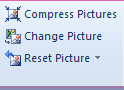
Next to the Artistic Effects icon is a small menu with three items on it:
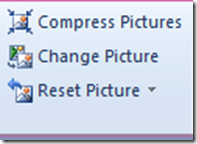
Compress Pictures allows you to reduce the physical size of the graphic so that it won’t be so large when sending with e-mails, or using as an avatar. Choosing these options reduces the resolution of your image which generally results in blurring.
Change Picture allows you to replace the picture or graphic you’ve chosen with a different one off of your hard drive.
Note: Changing your picture will result in the loss of the formatting you’ve done to the picture you’re replacing.
Reset Picture allows you to jump back to what your image looked like before you made any changes to it.
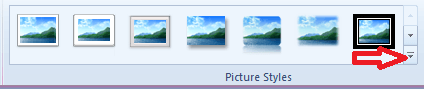
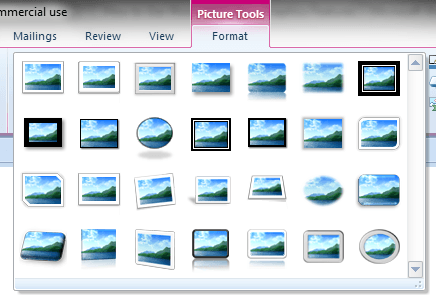
Next up are the Picture Styles:
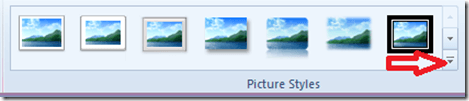
Clicking on the down arrow shows you them all at once:
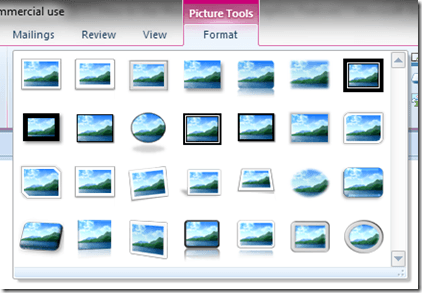
Once again, hovering over any of the styles causes your image to temporarily change to reflect the style shown, while clicking on that style causes it to take effect.
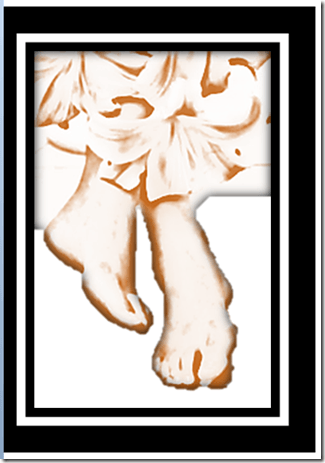
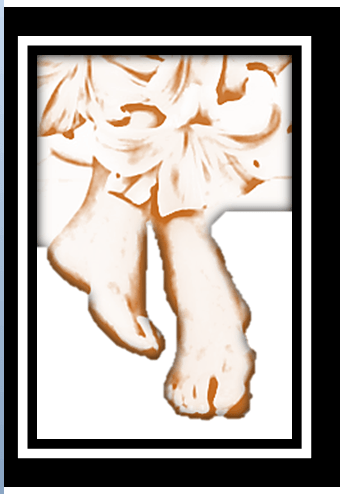
Here’s what our sample looks like after choosing the Double Frame Black effect:
Moving right again there is another menu with three choices on it:
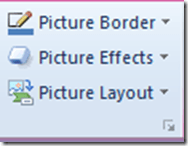
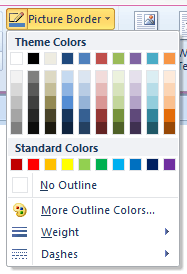
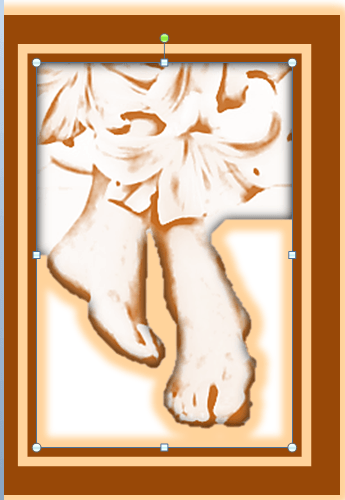
The Picture Border menu choice allows you to customize the border around your graphic. Clicking on it causes a drop-down to appear:
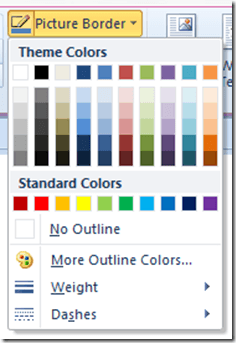
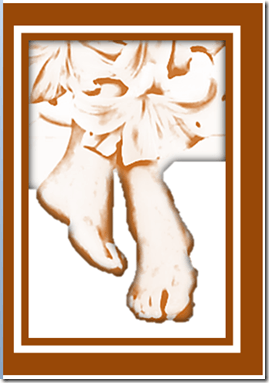
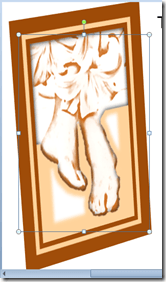
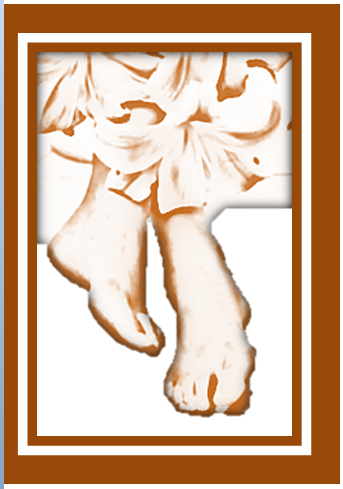
It works virtually the same as it has the past several iterations of Word, i.e. you click on the color/weight/dashes you want. Here’s what our sample looks like after clicking on one of the dark orange shades:
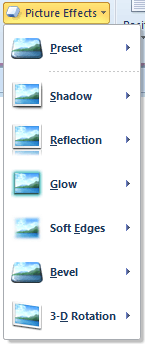
Picture Effects on the other hand, is all new. Clicking on it gives you this drop-down menu:
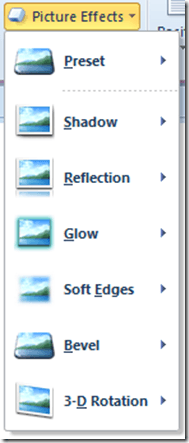
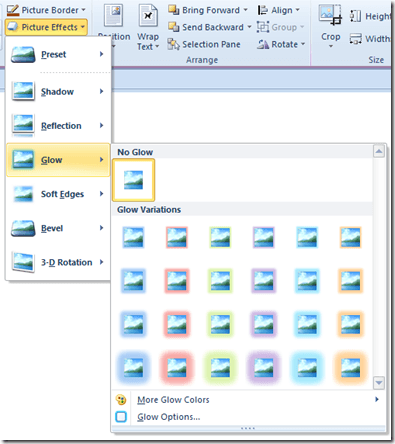
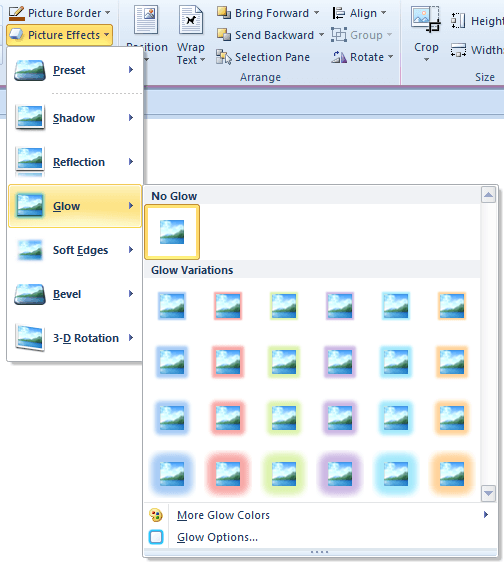
All of the options here work in exactly the same way; you click on a menu choice from the drop-down menu, then move your mouse over the objects shown, note the effects on your graphic, and then if you like one, you click on it to make it take effect. As an example, clicking on the Glow menu choice give you this drop-down:
And here’s what our sample looks like after choosing a medium orange glow effect:

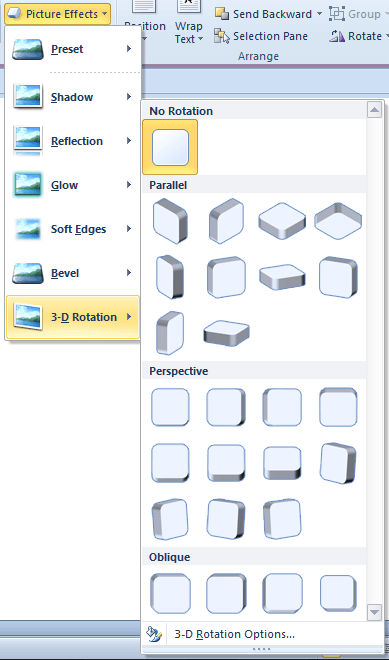
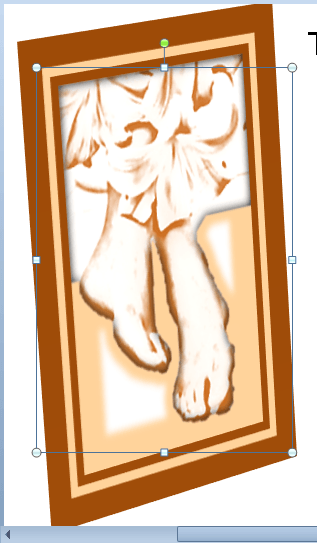
Another example would be adding 3-D effects, here’s the drop-down for it:
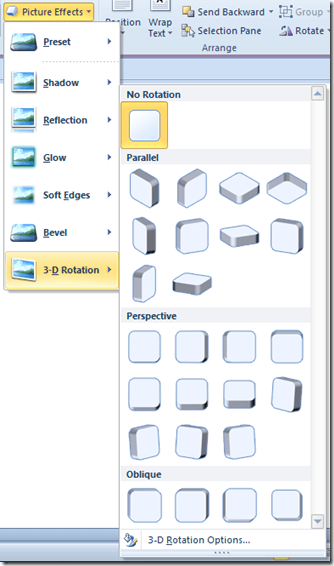
After applying one, here’s what our sample looks like:
The third option menu choice is the Picture Layout tool; it doesn’t really apply here, as it’s mainly used for creating org charts, etc. But here’s what it looks like:
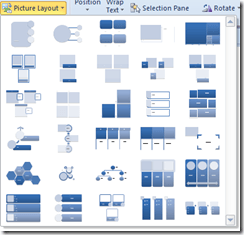
In essence what you do is click on the icon that seems most appropriate for you, then once it’s inserted into your document, you fill in the data cells.
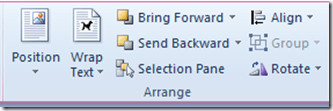
From this point on, everything else on the Picture Tools menu is the same as it was for Word 2007 and in many cases 2003. For the most part they are comprised of picture arrangement tools:
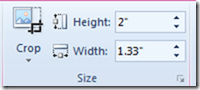
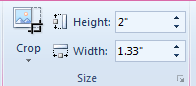
And graphic sizing tools:
In summation, Word 2010 gives users far more power and flexibility in manipulating images directly in documents than it ever has before, which should help in developing more professional looking documents both for work and at home.
Virtually all of Word’s new graphics features start with the insertion of a graphic into a Word document. To do so, first find a suitable graphic image that you’d like to work with and that might benefit from some graphic enhancement techniques. Below is one example retrieved from stock.xchng:

Note: Be sure to notice how when a picture or graphic is inserted into a document, the Picture Tools Ribbon is automatically displayed. All of the new Word 2010 graphics features appear on this ribbon.
One thing you might want to do first is remove the background as described in another post: How to Use Word 2010 Remove Background Tool.
This gives us:
Moving across the Picture Tools menu, the next thing we might want to try is Corrections. This feature allows you to sharpen or soften images or adjust the brightness and contrast. Move your mouse over each image to get a preview of what the effect will do to your image. When you’re ready to pick one, simply click on it.
Choosing to make our image a little sharper, we get:
Next up is the Color icon, its purpose is to add saturation, tone or tints. Clicking on it gives this dropdown menu:
Again, first slide your mouse over the previews until you find one you like, then click.
Here’s what our image looks like after adding some color tone:

Continuing to move to the right along the Picture Tools menu, is the Artistic Effects icon. Its purpose is to distort the selected image in artistic ways. The dropdown for it looks like this:
This is what our sample looks like after applying the Photo Copy Effect:
Next to the Artistic Effects icon is a small menu with three items on it:
Compress Pictures allows you to reduce the physical size of the graphic so that it won’t be so large when sending with e-mails, or using as an avatar. Choosing these options reduces the resolution of your image which generally results in blurring.
Change Picture allows you to replace the picture or graphic you’ve chosen with a different one off of your hard drive.
Note: Changing your picture will result in the loss of the formatting you’ve done to the picture you’re replacing.
Reset Picture allows you to jump back to what your image looked like before you made any changes to it.
Next up are the Picture Styles:
Clicking on the down arrow shows you them all at once:
Once again, hovering over any of the styles causes your image to temporarily change to reflect the style shown, while clicking on that style causes it to take effect.
Here’s what our sample looks like after choosing the Double Frame Black effect:
Moving right again there is another menu with three choices on it:

The Picture Border menu choice allows you to customize the border around your graphic. Clicking on it causes a drop-down to appear:
It works virtually the same as it has the past several iterations of Word, i.e. you click on the color/weight/dashes you want. Here’s what our sample looks like after clicking on one of the dark orange shades:
Picture Effects on the other hand, is all new. Clicking on it gives you this drop-down menu:
All of the options here work in exactly the same way; you click on a menu choice from the drop-down menu, then move your mouse over the objects shown, note the effects on your graphic, and then if you like one, you click on it to make it take effect. As an example, clicking on the Glow menu choice give you this drop-down:
And here’s what our sample looks like after choosing a medium orange glow effect:
Another example would be adding 3-D effects, here’s the drop-down for it:
After applying one, here’s what our sample looks like:
The third option menu choice is the Picture Layout tool; it doesn’t really apply here, as it’s mainly used for creating org charts, etc. But here’s what it looks like:
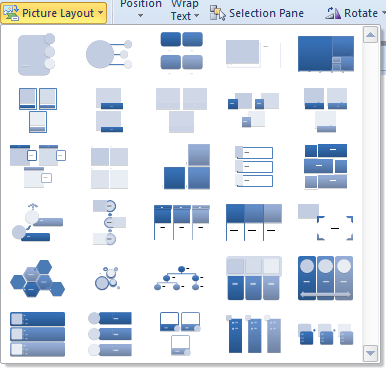
In essence what you do is click on the icon that seems most appropriate for you, then once it’s inserted into your document, you fill in the data cells.
From this point on, everything else on the Picture Tools menu is the same as it was for Word 2007 and in many cases 2003. For the most part they are comprised of picture arrangement tools:

And graphic sizing tools:
In summation, Word 2010 gives users far more power and flexibility in manipulating images directly in documents than it ever has before, which should help in developing more professional looking documents both for work and at home.
No comments:
Post a Comment