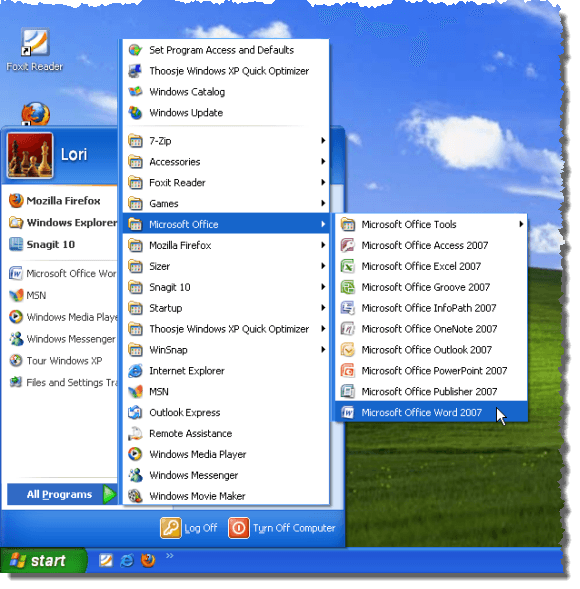
The All Programs link on the Start menu in Windows XP brings up a popup menu containing all installed programs.
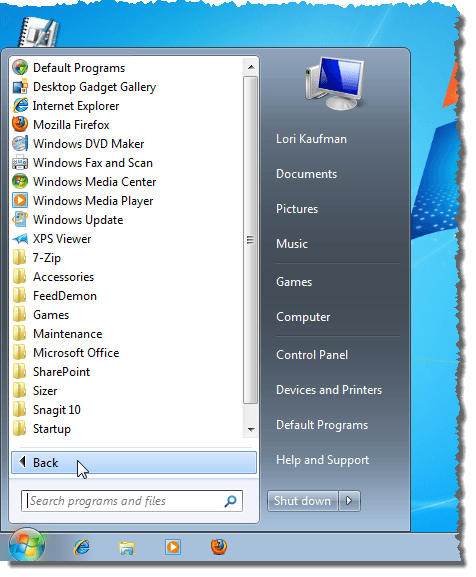
This feature was changed in Windows 7 and Vista. The All Programs link on the Start menu brings up the list of installed programs directly on the Start menu.
We found a tool, called Start Menu XP, that brings back the All Programs popup menu in Windows 7, and provides additional, handy features, as well. There is a free version and a Pro version (available for $19.99) that has additional features. Both the free and Pro versions of Start Menu XP allow the All Programs popup menu to take up the entire screen as necessary. You do not need to scroll up and down to access the programs on the menu.
Download the free version of Start Menu XP from
http://www.startmenuxp.com/
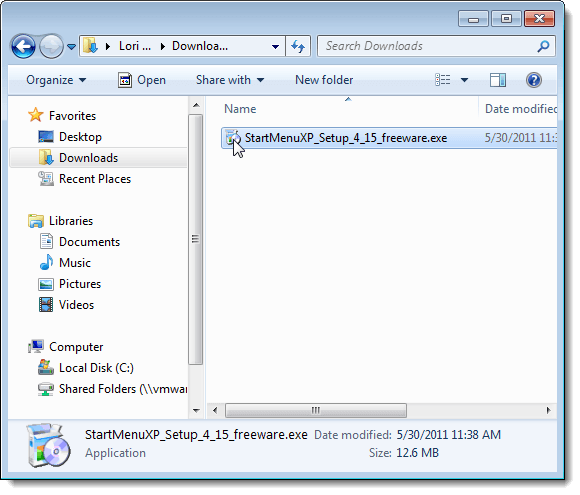
To install Start Menu XP, double-click the .exe file you downloaded.
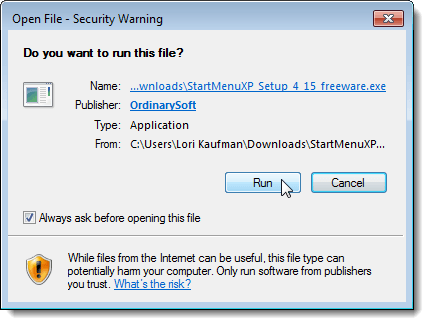
If the Open File – Security Warning dialog box displays, click Run to continue with the installation.
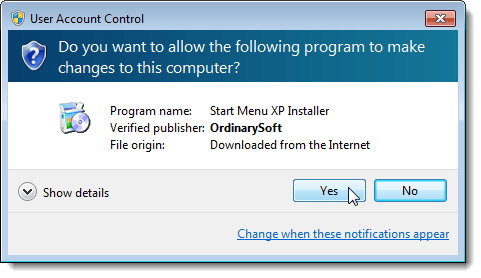
If the User Account Control dialog box displays, click Yes to continue.
NOTE: You may not see this dialog box, depending on your User Account Control settings. See our post, Windows 7 – How to configure UAC (User Account Control), for more information.
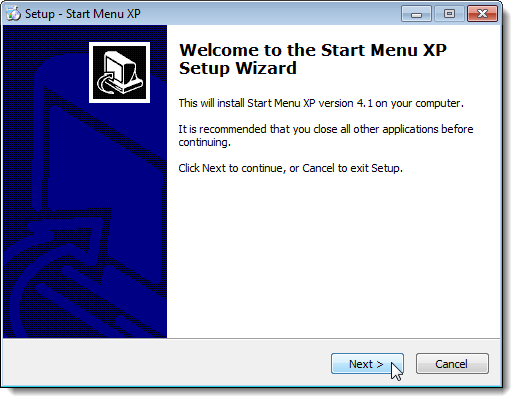
The Welcome screen on the setup wizard displays. Click Next.
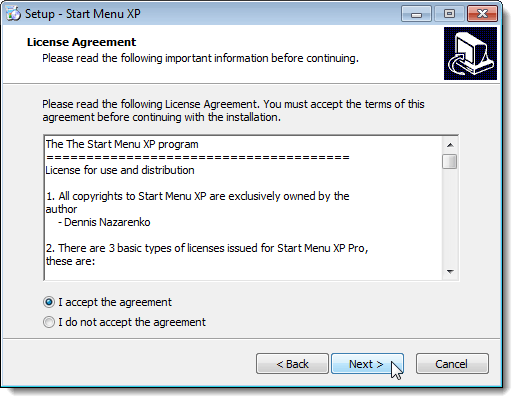
Read through the License Agreement and select the I accept the agreement radio button. Click Next.
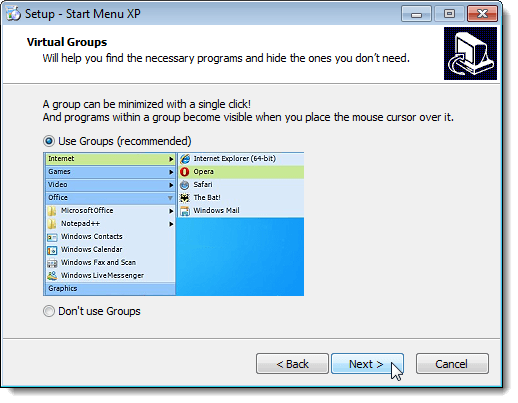
On the Virtual Groups screen, select the Use Groups radio button to be able to organize your programs into groups on the All Programs popup menu. We recommend this option because this feature will help you to organize the programs on the Start menu. Click Next.
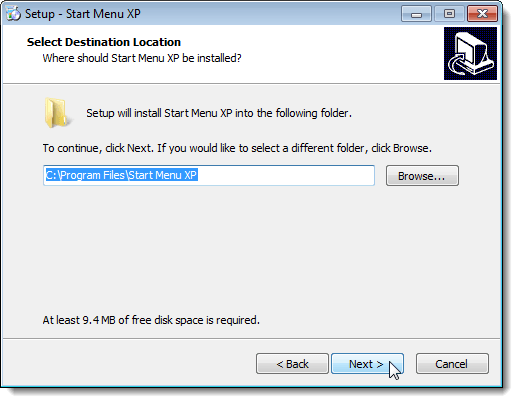
The Select Destination Location screen displays. If you want to install Start Menu XP to a different location other than the default location listed in the edit box, use the Browse button to select another location. We accepted the default location. Click Next to continue.
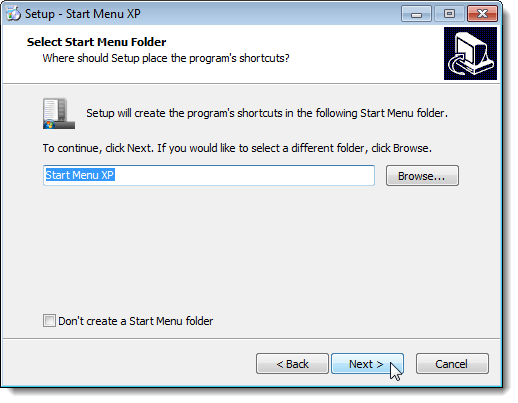
The Select Start Menu Folder screen displays. If you want to add the shortcuts for Start Menu XP to a different Start menu folder than the default listed in the edit box, use the Browse button. If you don’t want to create a Start menu folder for Start Menu XP, select the Don’t create a Start Menu folder check box. We accepted the default Start menu folder. Click Next to continue.
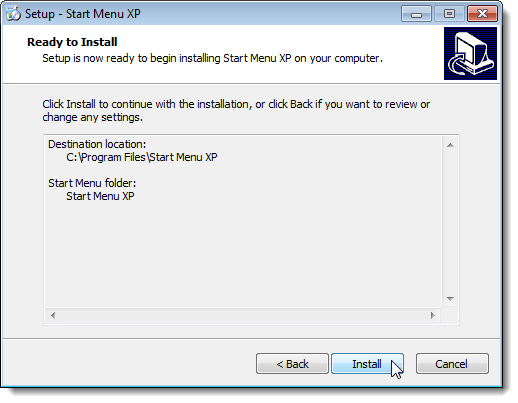
The Ready to Install screen displays with a summary of the settings you selected. If you want to change any of the settings, use the Back button. Otherwise, click Install to continue with the installation.
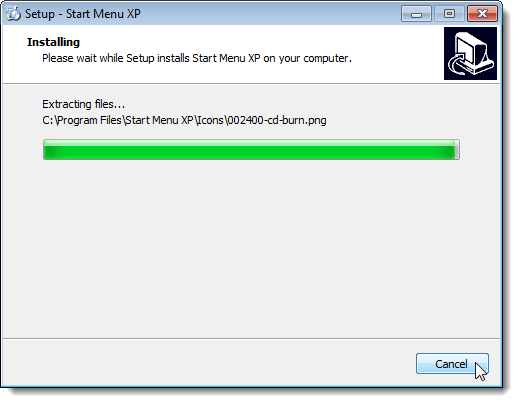
The progress of the installation displays.
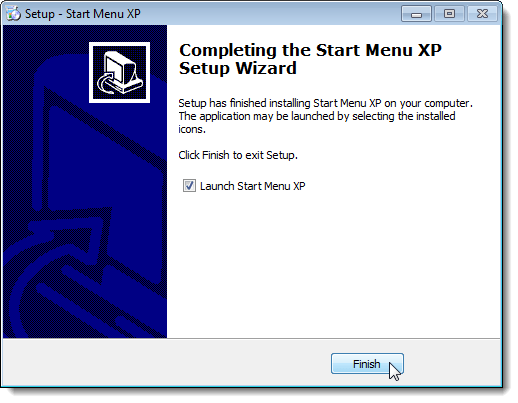
Once the installation is done, the Completing the Start Menu XP Setup Wizard screen displays. If you want Start Menu XP to start as soon as you close the setup wizard, select the Launch Start Menu XP check box so there is a check mark in it. It should be selected by default. Click Finish to close the setup wizard.
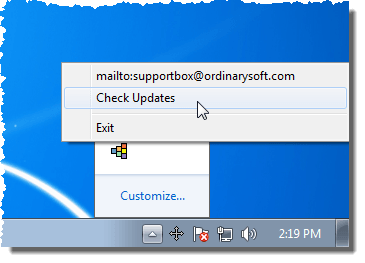
The Start Menu XP icon is added to the system tray. Right-clicking on the icon displays a small menu for Start Menu XP. You can email for support, check for updates, and exit Start Menu XP.
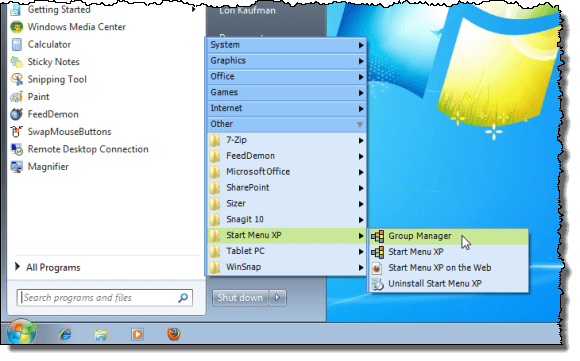
Now, when you move your mouse over the All Programs link on the Start menu, The menu pops up instead of displaying on the Start menu. To start organizing your programs into groups, open the Group Manager from the Start Menu XP folder on the All Programs popup menu.
NOTE: You can also right-click on the All Programs popup menu and select Manage Groups from the secondary popup menu that displays.
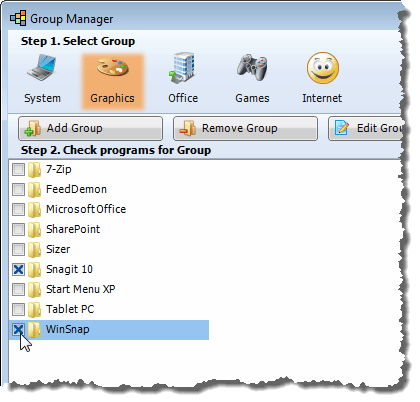
The free version of Start Menu XP allows you to sort your programs into five different pre-defined groups. Select a group to which you want to add programs from the buttons by clicking the appropriate group button under Step 1.
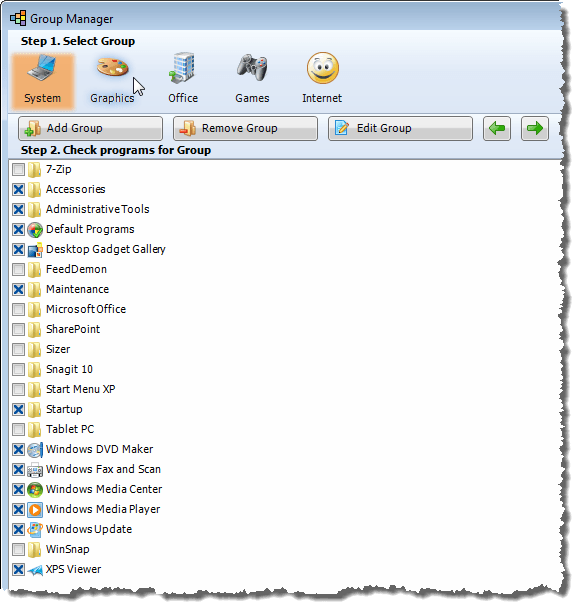
Next, select the check boxes to the left of the programs under Step 2 that you want to add to the selected group. Programs are always sorted in alphabetical order within each group.
NOTE: To remove a program from a group, simply activate that group in Step 1 of the Group Manager and select the check box for that program so there is no X mark in the box. The program is automatically moved back to the Other group. Then, you can move it to another group, if desired. Any programs that have not been sorted into groups display in the list for each group, allowing you to add unsorted programs to any groups.
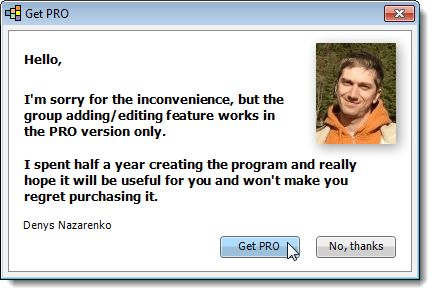
NOTE: If you click the Add Group button, Remove Group button, or Edit Group button, the following dialog box displays. The free version only allows you to sort your programs into the five pre-defined groups. You cannot add, remove, edit the groups unless you buy the Pro version.
Once you have finished organizing your programs into groups, click the X button in the upper, right corner of the Group Manager window to close it.
The programs on the All Programs popup menu are now displayed in groups. Any programs you did not move to one of the five pre-defined groups is categorized under Other.
Creating virtual groups in Start Menu XP can help you organize your Start menu, allowing you to show items you use more often right on the popup menu.
If a group is minimized (the arrow is black and pointing to the right), the items in that group can be accessed by moving your mouse cursor over the group name.
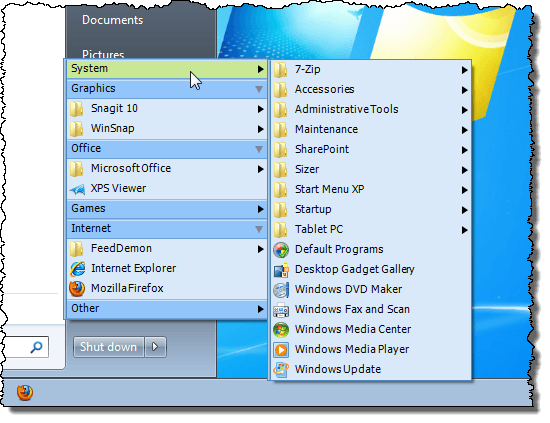
If a group is maximized (the arrow is gray and pointing down), the items in that group are visible directly on the All Programs popup menu.
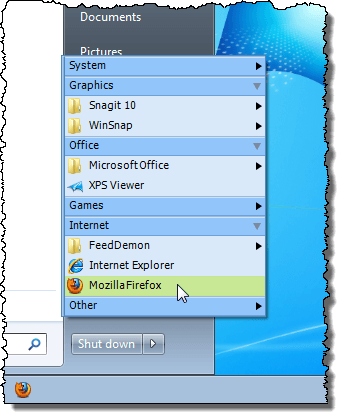
Using Start Menu XP, you can have your most often used programs in maximized groups, making them readily available, while programs you rarely use are placed in groups you leave minimized.

This feature was changed in Windows 7 and Vista. The All Programs link on the Start menu brings up the list of installed programs directly on the Start menu.

We found a tool, called Start Menu XP, that brings back the All Programs popup menu in Windows 7, and provides additional, handy features, as well. There is a free version and a Pro version (available for $19.99) that has additional features. Both the free and Pro versions of Start Menu XP allow the All Programs popup menu to take up the entire screen as necessary. You do not need to scroll up and down to access the programs on the menu.
Download the free version of Start Menu XP from
http://www.startmenuxp.com/
To install Start Menu XP, double-click the .exe file you downloaded.

If the Open File – Security Warning dialog box displays, click Run to continue with the installation.

If the User Account Control dialog box displays, click Yes to continue.
NOTE: You may not see this dialog box, depending on your User Account Control settings. See our post, Windows 7 – How to configure UAC (User Account Control), for more information.

The Welcome screen on the setup wizard displays. Click Next.

Read through the License Agreement and select the I accept the agreement radio button. Click Next.

On the Virtual Groups screen, select the Use Groups radio button to be able to organize your programs into groups on the All Programs popup menu. We recommend this option because this feature will help you to organize the programs on the Start menu. Click Next.

The Select Destination Location screen displays. If you want to install Start Menu XP to a different location other than the default location listed in the edit box, use the Browse button to select another location. We accepted the default location. Click Next to continue.

The Select Start Menu Folder screen displays. If you want to add the shortcuts for Start Menu XP to a different Start menu folder than the default listed in the edit box, use the Browse button. If you don’t want to create a Start menu folder for Start Menu XP, select the Don’t create a Start Menu folder check box. We accepted the default Start menu folder. Click Next to continue.

The Ready to Install screen displays with a summary of the settings you selected. If you want to change any of the settings, use the Back button. Otherwise, click Install to continue with the installation.

The progress of the installation displays.

Once the installation is done, the Completing the Start Menu XP Setup Wizard screen displays. If you want Start Menu XP to start as soon as you close the setup wizard, select the Launch Start Menu XP check box so there is a check mark in it. It should be selected by default. Click Finish to close the setup wizard.

The Start Menu XP icon is added to the system tray. Right-clicking on the icon displays a small menu for Start Menu XP. You can email for support, check for updates, and exit Start Menu XP.
Now, when you move your mouse over the All Programs link on the Start menu, The menu pops up instead of displaying on the Start menu. To start organizing your programs into groups, open the Group Manager from the Start Menu XP folder on the All Programs popup menu.
NOTE: You can also right-click on the All Programs popup menu and select Manage Groups from the secondary popup menu that displays.

The free version of Start Menu XP allows you to sort your programs into five different pre-defined groups. Select a group to which you want to add programs from the buttons by clicking the appropriate group button under Step 1.

Next, select the check boxes to the left of the programs under Step 2 that you want to add to the selected group. Programs are always sorted in alphabetical order within each group.
NOTE: To remove a program from a group, simply activate that group in Step 1 of the Group Manager and select the check box for that program so there is no X mark in the box. The program is automatically moved back to the Other group. Then, you can move it to another group, if desired. Any programs that have not been sorted into groups display in the list for each group, allowing you to add unsorted programs to any groups.

NOTE: If you click the Add Group button, Remove Group button, or Edit Group button, the following dialog box displays. The free version only allows you to sort your programs into the five pre-defined groups. You cannot add, remove, edit the groups unless you buy the Pro version.

Once you have finished organizing your programs into groups, click the X button in the upper, right corner of the Group Manager window to close it.

The programs on the All Programs popup menu are now displayed in groups. Any programs you did not move to one of the five pre-defined groups is categorized under Other.
Creating virtual groups in Start Menu XP can help you organize your Start menu, allowing you to show items you use more often right on the popup menu.
If a group is minimized (the arrow is black and pointing to the right), the items in that group can be accessed by moving your mouse cursor over the group name.

If a group is maximized (the arrow is gray and pointing down), the items in that group are visible directly on the All Programs popup menu.

Using Start Menu XP, you can have your most often used programs in maximized groups, making them readily available, while programs you rarely use are placed in groups you leave minimized.


This comment has been removed by the author.
ReplyDeleteNice Blog Thanks for Sharing!
ReplyDeletesales automation tools
business directory
ReplyDeleteThanks For Sharing.Such a nice Post.
Start Menu X Pro Crack
I like your all post. You have done really good work. Thank you for the information you provide, it helped me a lot.
ReplyDeleteStart Menu X Pro Crack
HandBrake CS2 Crack
MacKeeper Crack
NCH Express Zip Crack
TeamViewer Crack
HandBrake CS2 Crack
WavePad Sound Editor Crack
Adobe Lightroom Crack