
 One of the features many people love in Microsoft Office Word is WordArt, which allows you to create beautiful headline or banner text without any real graphic skills. Different formats and color options are available to create a fully custom WordArt work of art.
In OpenOffice Writer, this feature exists, but with a different name. FontWork works almost the exact same as WordArt, but if you’re used to Word, finding the option may be a little difficult at first.
Using FontWork
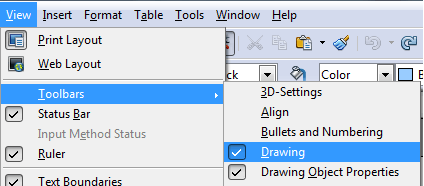
The first thing you need is the Drawing toolbar. Open an OpenOffice Writer document, select the View menu and choose Toolbars. Select Drawing. If the Drawing is already checked, then you already have this toolbar displayed on your screen.By default, the Drawing toolbar is displayed at the bottom of the document window. The toolbar should look similar to the following:
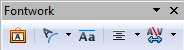
Press the FontWork button near the end of the toolbar to add a new FontWork object to your document.
Select a FontWork style from the provided list. You can change the text, size and even colors later.

Press OK to add it to your document. It will insert wherever your cursor is. One or two menus will appear, depending on the type of image you pick. For 3D images, a 3D menu appears in addition to the FontWork menu.
Change the FontWork text to your own by double-clicking the FontWork image. If you can’t select the image, hold Ctrl while single-clicking the object to select it. The current text appears within your object. Use your backspace key to delete the current text and then type your own. Press Esc to exit the text editor when finished.

Once you have your desired text, it’s time to resize and shape the FontWork object to fit your document. Select the object to make the FontWork menu appear.
The first button allows you to change the type of FontWork object (returning you to the FontWork gallery). The second button lets you change the shape of the FontWork object. For instance, instead of circular, my FontWork could be in a wave shape. The third button lets you choose whether all letters are the same size or not. The fourth button changes the alignment of your object. The final button allows you to change the spacing between characters.
You can change the color of your FontWork object by using the Drawing Object Properties toolbar, which appears at the top of your document window or by using the 3D object toolbar (only appears for 3D FontWork objects). If you don’t see the Drawing Object Properties toolbar, go to View, select Toolbars and select Drawing Object Properties.
Notes
Selecting objects can be tricky. By default, FontWork objects are placed in the background. Use the Drawing Object Properties toolbar to bring objects to the front if desired.For background objects, you must press Ctrl while selecting an object or you cannot select it. When an object is selected, use your arrow keys to reposition the object. You can also use the handles on the object to resize it, either larger or smaller.
No comments:
Post a Comment