Avant Window Navigator (
AWN) is an highly customizable Max OS X-like application launcher and dock for Linux. It’s a dock-like navigation bar that sits at the bottom of your screen and has support for application launchers and applets. This post shows you how to install and use
AWN in Ubuntu 10.04, Lucid Lynx.
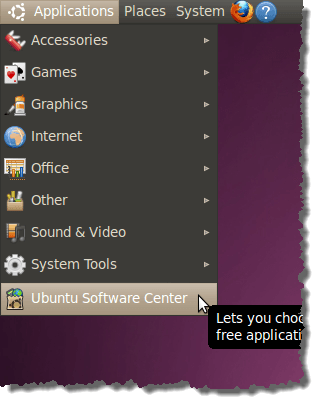
To install
AWN, select
Ubuntu Software Center from the
Applications menu.
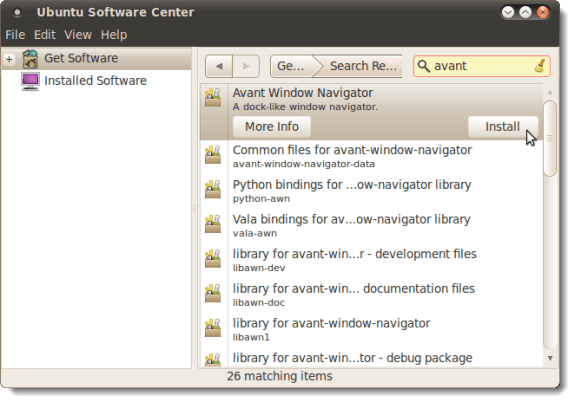
The
Ubuntu Software Center dialog box displays. Enter “
avant” (without the quotes) in the yellow search box. Results of your search display as you type. You should see
Avant Window Navigator as the first item in the list of results. Click the
Install button.
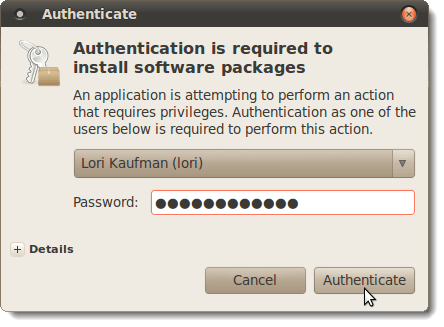
Enter your password in the
Password edit box on the
Authenticate dialog box and click
Authenticate.
NOTE: You might have to click the Install button again once you have authenticated to begin the installation.
The progress of the installation displays on a progress bar above the Install button. The left pane indicates that
1 installation is in progress.
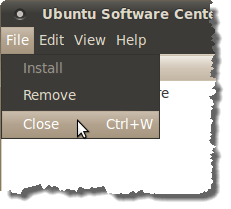
Once the installation is finished, select
Close from the
File menu to close the
Ubuntu Software Center.
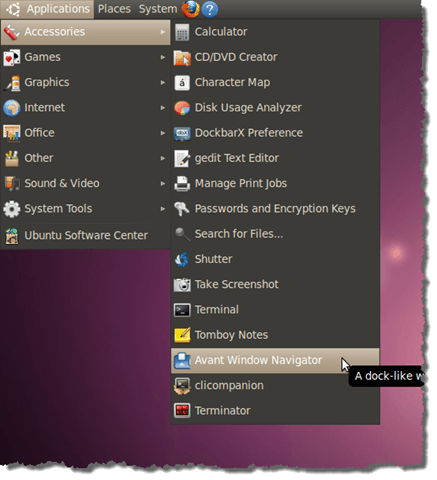
To open
Avant Window Navigator, select
Accessories | Avant Window Navigator from the
Applications menu.
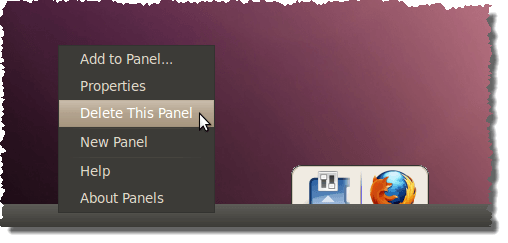
The
AWN dock displays at the bottom of the screen. Notice that it is partially covered by the bottom panel. You can safely delete the panel because you can add the items that are generally on the bottom panel, such as the
Show Desktop button and the
Trash Can, to the
AWN dock. To remove the bottom panel, right-click on the panel and select
Delete this Panel from the popup menu.
NOTE: If you want to restore the bottom panel, we show you how to do that at the end of this post.
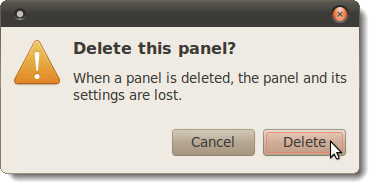
A confirmation dialog box displays, warning you that all the settings for the panel will be lost when it is deleted. Click
Delete to remove the bottom panel.
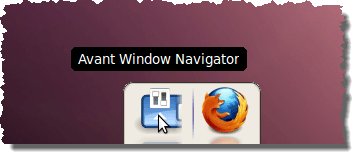
NOTE: You can add items back to the panel when you add the panel back using the
Add to Panel option on the popup menu.
Now, we will access the preferences for
AWN to set up the dock. Click the
Avant Window Navigator button.
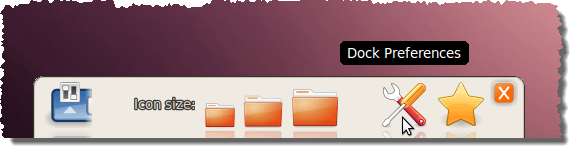
Different buttons display providing options for setting up the
AWN dock. You can change the size of the icons on the dock using the
Icon size buttons. Click the
Dock Preferences button.
NOTE: You can also access the
Dock Preferences by right-clicking on the dock and selecting the option from the popup menu.
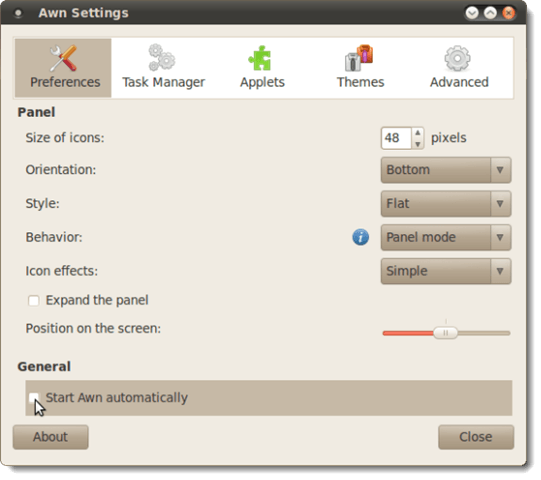
The
Awn Settings dialog box displays. To start
Avant Window Navigator automatically when you log into Ubuntu, select the
Start Awn automatically check box on the
Preferences screen so there is a check mark in the box.
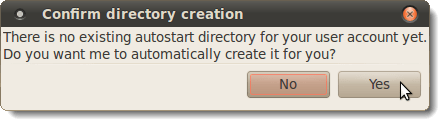
You may see
Confirm directory creation dialog box if you do not have an autostart directory yet. Click
Yes to create one.
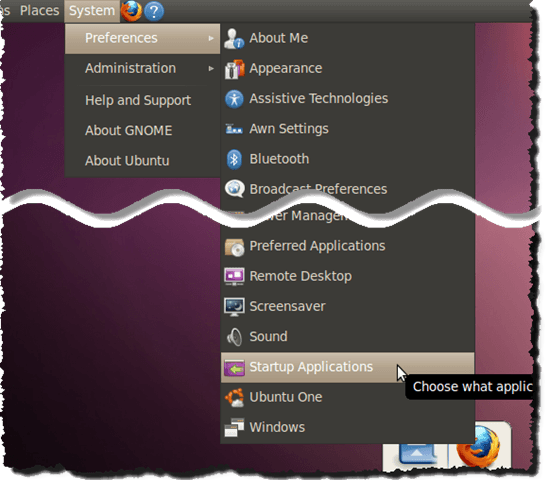
NOTE: If selecting the
Start Awn automatically check box does not work, there is another way of adding a program to the list of programs started automatically when the computer is booted. Select
Preferences | Startup Applications from the
System menu.
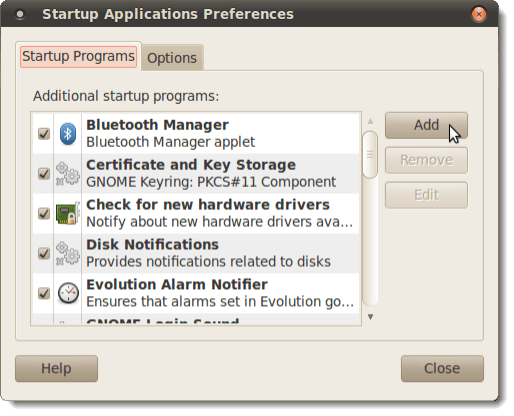
The
Startup Applications Preferences dialog box displays. On the
Startup Programs tab, click the
Add button.
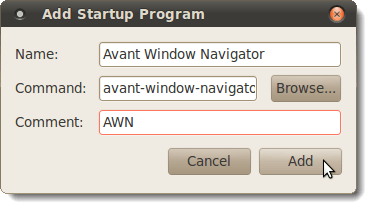
On the
Add Startup Program dialog box, enter the following text for each of the following edit boxes:
- Name: Avant Window Navigator
- Command: avant-window-navigator
- Comment: AWN (or whatever comment you want to enter)
Click
Add.
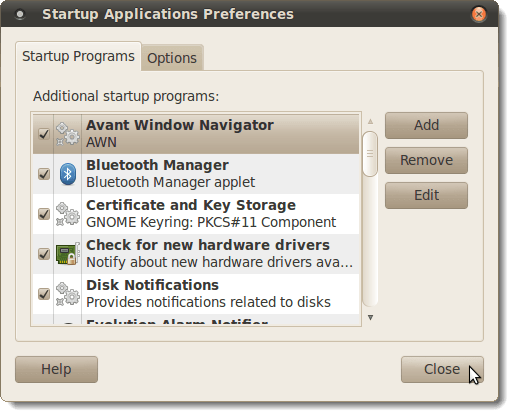
Avant Window Navigator is added to the list of
Additional startup programs. Click
Close to close the
Startup Applications Preferences dialog box.
Once you have set
AWN to start automatically, it is time to start adding programs to the dock. The easiest way to do this is to open the
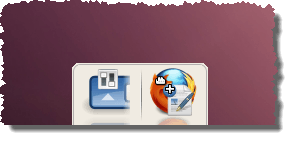
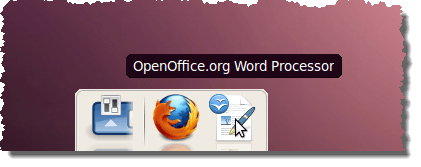
Applications menu on the top panel and drag a desired program from the menu to the dock. In the image below, we are dragging
OpenOffice.org Word Processor to the dock.
Once you release the mouse, the icon is added to the dock.
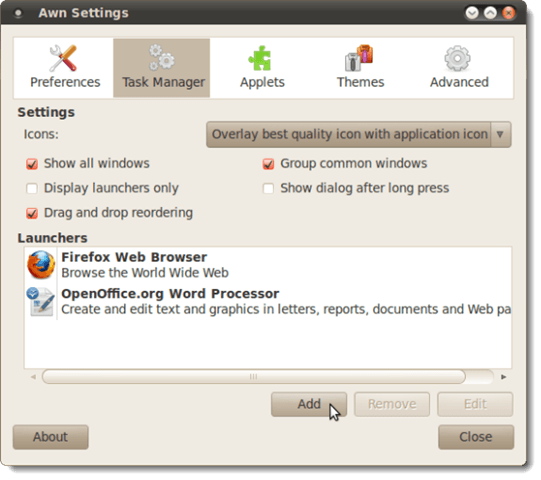
You can also add applications to the dock using the
Awn Settings dialog box we discussed earlier. Click the
Task Manager button at the top of the dialog box and click the
Add button below the list of launchers.
NOTE: Notice that
OpenOffice.org Word Processor displays in the list of launchers even though we added it outside of this screen.
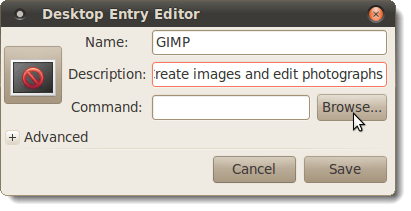
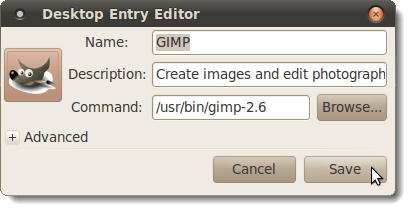
We chose to add the
GIMP graphics application using this method. When the
Desktop Entry Editor dialog box displays, enter
GIMP in the
Name edit box. Enter a description for the application in the
Description edit box. To enter the
Command, click the
Browse button.
NOTE: To find the path to a program you want to add to the
AWN dock, use the
which command followed by the executable you want to find. In the case of this example, we want to find the path to
GIMP 2.6. To do this, we open a Terminal window and enter the following command at the prompt.
$ which gimp-2.6
The result of the command displays on the next line of the Terminal window.
/usr/bin/gimp-2.6
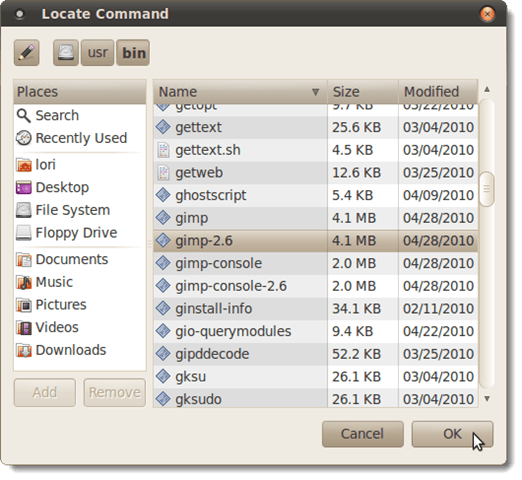
On the
Locate Command dialog box, accessed using the
Browse button on the
Desktop Entry Editor dialog box, navigate to the directory containing the executable file, and select the file. Click
OK.
To change the icon used for the application, click the icon button on the
Desktop Entry Editor dialog box.
Select
From File or
From Theme at the top of the
Select Icon dialog box to indicate from where you are getting your icon. We found a
GIMP icon, in
.png format, online that we downloaded, so se selected
From File. Use the drop-down list to navigate to the folder containing the icon file you want to use. Select the icon and click
OK.
On the
Desktop Entry Editor dialog box, click
Save.
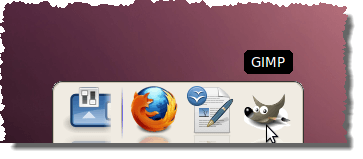
GIMP is added to the
AWN dock.
To remove an application from the dock, open the
Awn Settings dialog box again, if it is not still open. Select the application you want to remove in the
Launchers list and click
Remove.
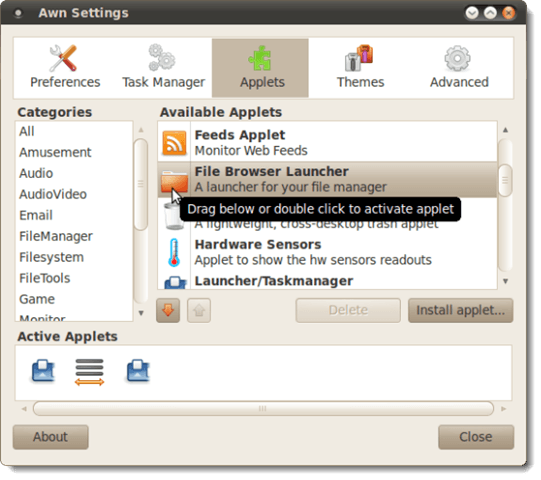
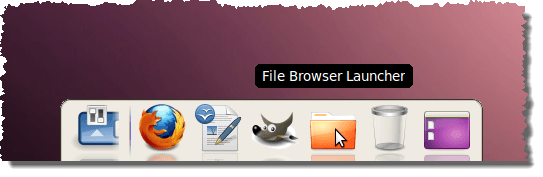
You can also add applets to the
AWN dock, such as the
Trash can and the
Show Desktop button, that make the
AWN dock a good replacement for your bottom panel. To add applets, click the
Applets button at the top of the
Awn Settings dialog box. Select All at the top of the
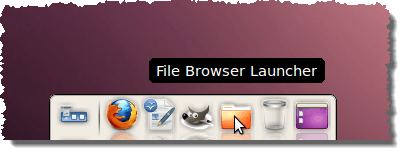
Categories list to view all of the available applets. We chose to add the
File Browser Launcher to our dock. Scroll down until you find the desired applet and either double-click on it or drag it to the dock.
We also added the
Garbage (Trash can) applet and the
Show Desktop applet to our dock.
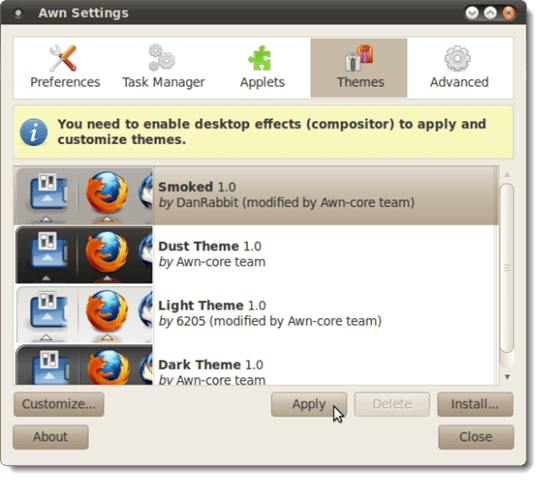
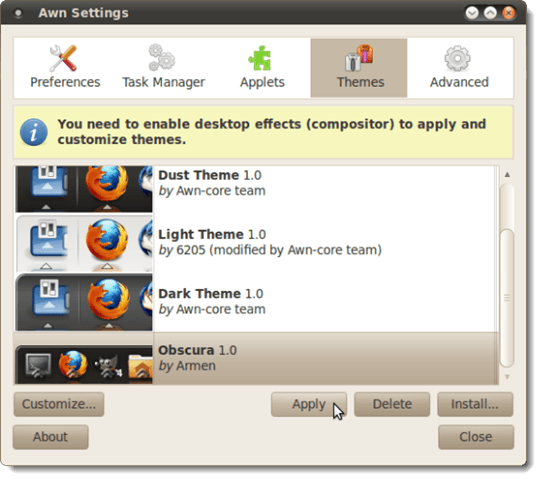
AWN comes with a nice theme set by default, but you can apply different themes to the dock. Click the
Themes button at the top of the
Awn Settings dialog box. Select one of the themes that comes with
AWN and click
Apply.
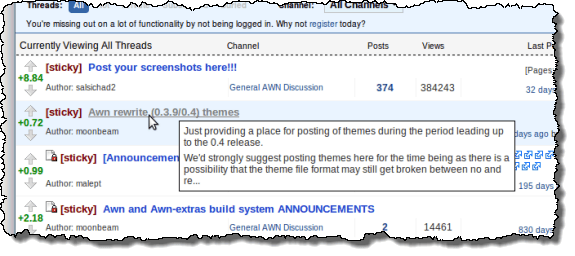
To download themes compatible with version 0.4 of AWN, go to the following website and click the
Awn rewrite (0.3.9/0.4) themes sticky thread in the forum.
http://awn.planetblur.org/
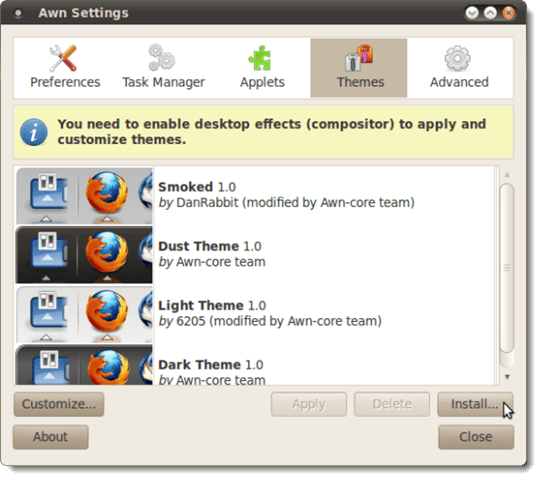
To install a theme you downloaded, click the
Install button on the
Themes screen on the
Awn Settings dialog box.
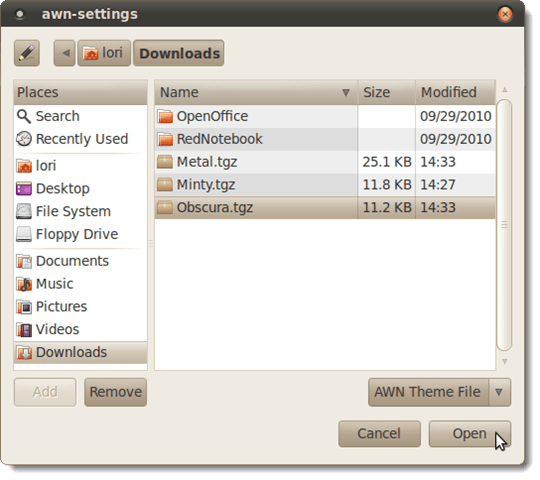
On the
awn-settings dialog box that displays, navigate to the folder into which you downloaded the theme file, select the
.tgz file, and click
Open.
The theme is added to the list. Select it and click
Apply.
NOTE: For information about installing the
CompizConfig Settings Manager that is required for
AWN to work correctly, see our post,
Install Desktop Widgets in Ubuntu. There are instructions within that post for installing the
CompizConfig Settings Manager.
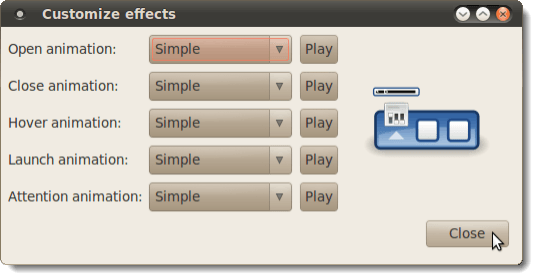
The
Customize effects dialog box displays. Accept the defaults and click
Close.
The look of your
AWN dock changes.
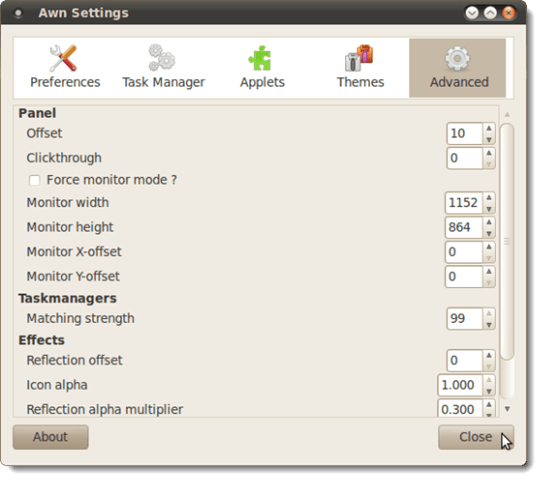
There are also additional settings on the
Advanced screen on the
Awn Settings dialog box.
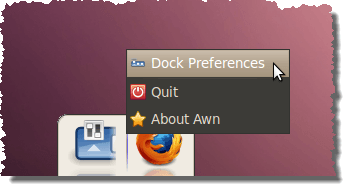
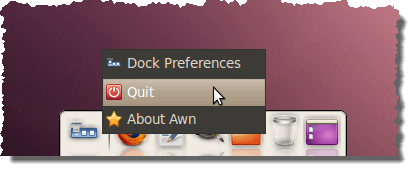
To close
AWN, right-click on the dock and select
Quit from the popup menu.
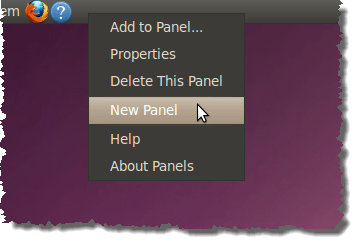
If you have closed
AWN and you want the bottom panel back, right-click on the top panel and select
New Panel.
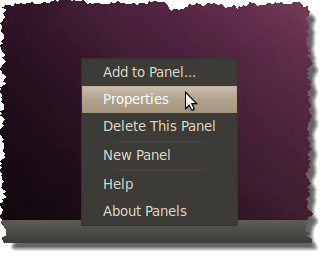
The new panel may display along any of the edges of the screen. To move the panel to the desired location, right-click on the new panel and select
Properties from the popup menu.
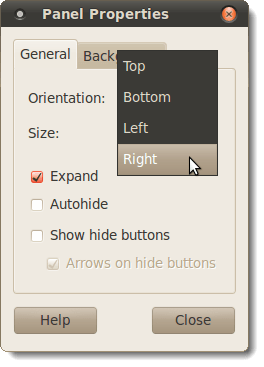
The
Panel Properties dialog box displays. On the
General tab, select a desired location for the new panel from the
Orientation drop-down list.
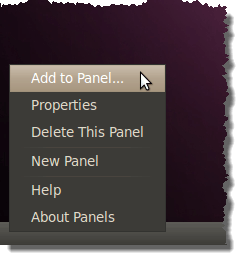
To add items back to the new panel, right-click on the panel again, and select
Add to Panel from the popup menu.
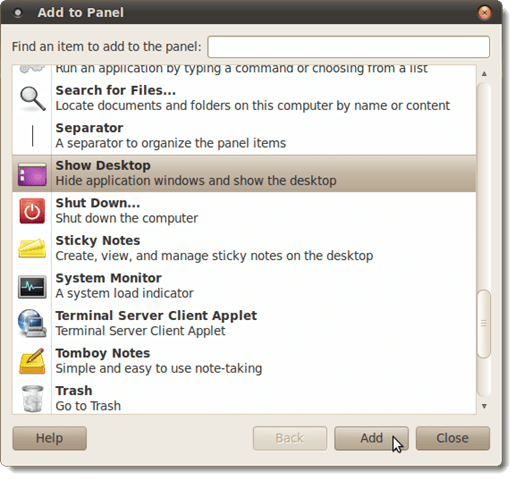
On the
Add to Panel dialog box, select items, such as
Show Desktop and
Trash, and click
Add.
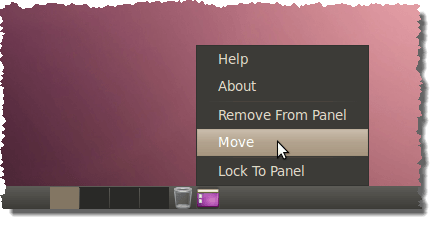
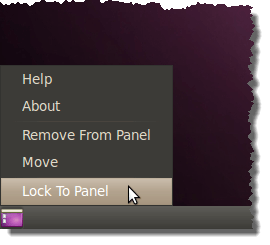
Depending on where you right-clicked on the panel when adding an item, the items may be added in spots different from where you intended. However, you can move them. To move an item, right-click on the item and select
Move from the popup menu.
The cursor becomes a hand. Move the hand along the panel to where you want to place the item. Click again when you have selected a place.
To lock the item in place, right-click on the item again, and select
Lock To Panel from the popup menu. You can move and lock any other items you add to the panel in the same way.
If you have no panels at all on your desktop, see our post,
Restore the Default Gnome Desktop Panels in Ubuntu, for steps to restore them. You can also lock down the panels so they can’t be changed or deleted. See our post,
Lock Down the Desktop Panels in Ubuntu 10.04, for more information.
NOTE: To access folders and files on your computer using
Avant Window Navigator, add the
File Browser Launcher applet or the
Places applet (or both) to your dock. You cannot add specific folders and files to the dock. You can only add applications and applets.


No comments:
Post a Comment