Microsoft is updating the Taskbar in the upcoming Windows 8 operating system to include a small user picture tile in the notification area of the Taskbar.
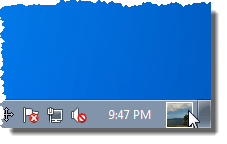
When you click the user picture tile, a popup menu displays which user is currently logged in and provides quick access to your user account settings directly from the Taskbar. We found a free tool, called Taskbar UserTile, that allows you to add the user picture tile with similar functionality to your Taskbar in Windows 7.
You can also use a video file as your user picture tile.
NOTE: Taskbar UserTile currently only works when the Taskbar is displayed at the bottom of the screen.
Download Taskbar UserTile from
http://angelwzr.deviantart.com/art/Taskbar-UserTile-Alpha-7-1-203811134.
NOTE: Taskbar UserTile comes as a .7z file. This type of file can be extracting using one of the following programs: 7-Zip, IZArc, WinRAR, or PowerArchiver. 7-Zip and IZArc are completely free.
Taskbar UserTile does not need to be installed. Simply extract the .7z file and double-click on the UserTile.exe file.
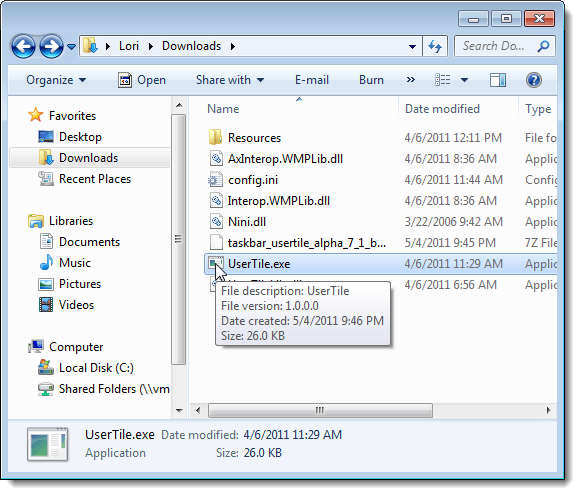
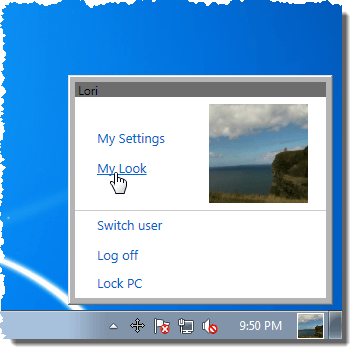
The user picture tile displays in the lower, right corner of the Taskbar to the left of the Show Desktop button. Click the user picture tile to access a popup menu that allows you to change settings and the appearance of your account, switch users, log off, and lock your PC. Click My Settings to access the Control Panel.
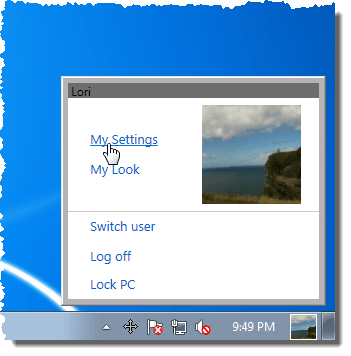
The main Control Panel window displays.
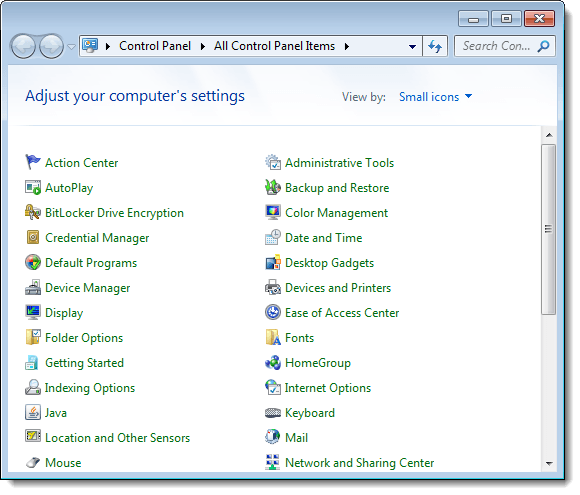
You can also access settings for your account from the Taskbar UserTile popup menu. To do this, click My Look.
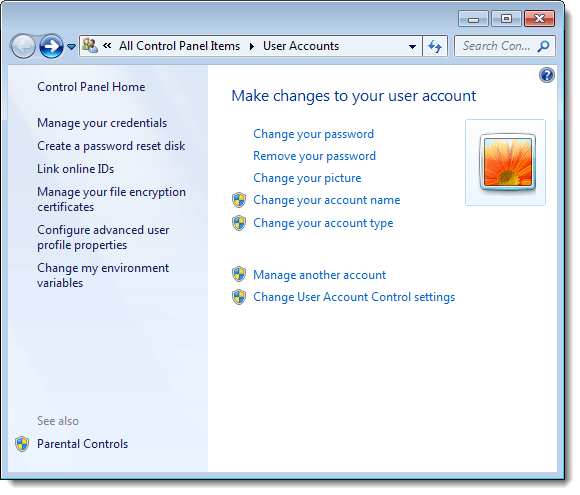
The User Accounts window in the Control Panel displays. Here you can change your user picture, which you can also display as your user picture tile. We explain how to do this later in this post.
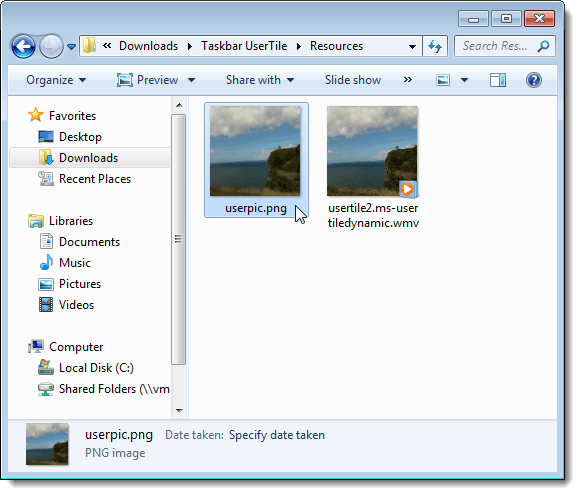
The default picture that Taskbar UserTile initially uses is located in a subfolder called Resources in the folder where you extracted the program. You can put your other picture files here that you can use as your user picture tile.
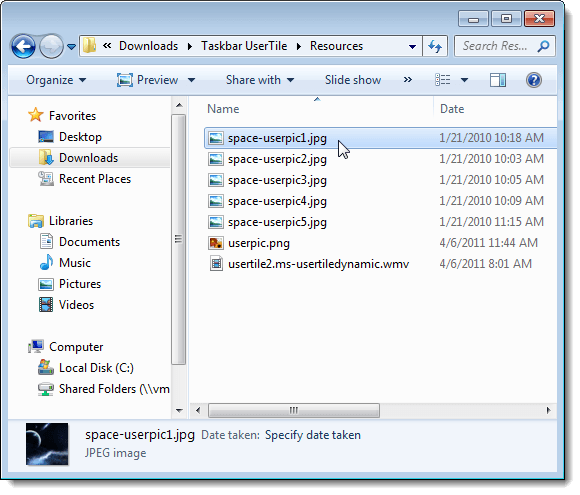
We found some extra user account pictures you can download and use as your user picture tile at the following site:
http://windows7themes.net/download-windows-7-user-account-pictures.html.
We downloaded the space user pictures and used one as an example for this post.
NOTE: You can put the pictures you want to use as your user picture tile in any folder. You just have to specify the full path to the picture file in the configuration file, which we will discuss below.
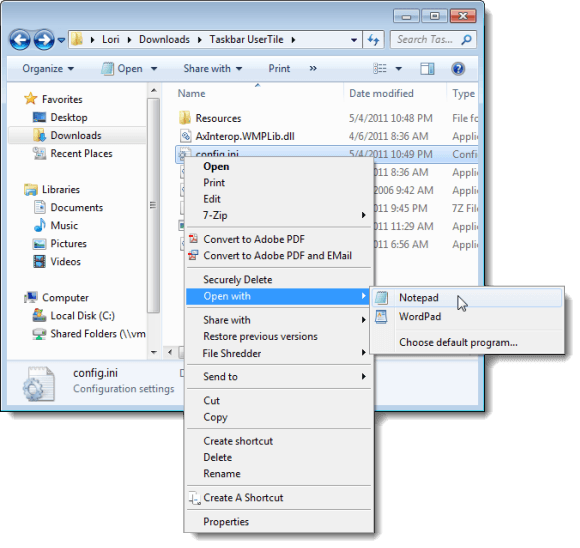
To specify the location of the custom picture file you want to use, navigate to the folder where you extracted the Taskbar UserTile files and right-click on the config.ini file. Select Open with | Notepad from the popup menu. You may be able to double-click on the file to open it in Notepad, but if this doesn’t work, use the right-click method.
NOTE: You can also choose to use the the picture showing for your user account. To do this, simply delete the config.ini file. Be sure to make a backup of the config.ini file before deleting it so you can easily go back to using custom pictures. You can just move it to another location outside of the folder containing the UserTile.exe file.
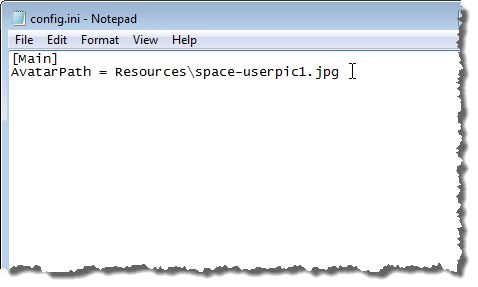
In the config.ini file, change the path to indicate the location of the custom picture file. If you put your picture file in the Resources folder, you only need to change the name of the file. If you put your picture file in another location, be sure to put the full path to the file after the equals sign. You can also specify the path to a video file in the config.ini file.
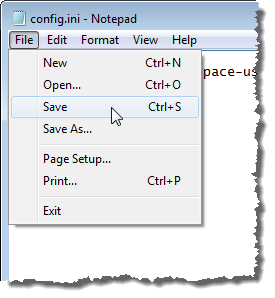
Select Save from the File menu or press Ctrl + S to save the file.
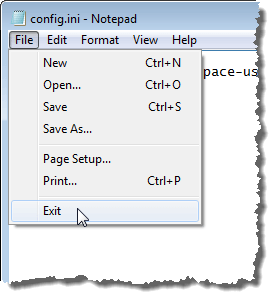
Close Notepad by selecting Exit from the File menu.
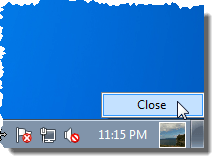
The user picture tile does not change automatically. You must close Taskbar UserTile and open it again. To close Taskbar UserTile, right-click on the user picture tile and select Close.
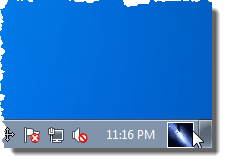
When you run UserTile.exe again, the custom picture file is used as your user picture tile on your Taskbar.
You can also create your own picture to use as the user picture tile. The standard size for user pictures is 48 x 48 pixels. It is recommended that you edit your custom picture to be this size so your user picture is not distorted.
Taskbar UserTile is still in the pre-beta stage. So, you might encounter some bugs while using it. We tested it on a 32-bit Windows 7 virtual machine without a problem.

When you click the user picture tile, a popup menu displays which user is currently logged in and provides quick access to your user account settings directly from the Taskbar. We found a free tool, called Taskbar UserTile, that allows you to add the user picture tile with similar functionality to your Taskbar in Windows 7.
You can also use a video file as your user picture tile.
NOTE: Taskbar UserTile currently only works when the Taskbar is displayed at the bottom of the screen.
Download Taskbar UserTile from
http://angelwzr.deviantart.com/art/Taskbar-UserTile-Alpha-7-1-203811134.
NOTE: Taskbar UserTile comes as a .7z file. This type of file can be extracting using one of the following programs: 7-Zip, IZArc, WinRAR, or PowerArchiver. 7-Zip and IZArc are completely free.
Taskbar UserTile does not need to be installed. Simply extract the .7z file and double-click on the UserTile.exe file.

The user picture tile displays in the lower, right corner of the Taskbar to the left of the Show Desktop button. Click the user picture tile to access a popup menu that allows you to change settings and the appearance of your account, switch users, log off, and lock your PC. Click My Settings to access the Control Panel.

The main Control Panel window displays.

You can also access settings for your account from the Taskbar UserTile popup menu. To do this, click My Look.

The User Accounts window in the Control Panel displays. Here you can change your user picture, which you can also display as your user picture tile. We explain how to do this later in this post.

The default picture that Taskbar UserTile initially uses is located in a subfolder called Resources in the folder where you extracted the program. You can put your other picture files here that you can use as your user picture tile.

We found some extra user account pictures you can download and use as your user picture tile at the following site:
http://windows7themes.net/download-windows-7-user-account-pictures.html.
We downloaded the space user pictures and used one as an example for this post.
NOTE: You can put the pictures you want to use as your user picture tile in any folder. You just have to specify the full path to the picture file in the configuration file, which we will discuss below.

To specify the location of the custom picture file you want to use, navigate to the folder where you extracted the Taskbar UserTile files and right-click on the config.ini file. Select Open with | Notepad from the popup menu. You may be able to double-click on the file to open it in Notepad, but if this doesn’t work, use the right-click method.
NOTE: You can also choose to use the the picture showing for your user account. To do this, simply delete the config.ini file. Be sure to make a backup of the config.ini file before deleting it so you can easily go back to using custom pictures. You can just move it to another location outside of the folder containing the UserTile.exe file.

In the config.ini file, change the path to indicate the location of the custom picture file. If you put your picture file in the Resources folder, you only need to change the name of the file. If you put your picture file in another location, be sure to put the full path to the file after the equals sign. You can also specify the path to a video file in the config.ini file.
Select Save from the File menu or press Ctrl + S to save the file.

Close Notepad by selecting Exit from the File menu.

The user picture tile does not change automatically. You must close Taskbar UserTile and open it again. To close Taskbar UserTile, right-click on the user picture tile and select Close.

When you run UserTile.exe again, the custom picture file is used as your user picture tile on your Taskbar.

You can also create your own picture to use as the user picture tile. The standard size for user pictures is 48 x 48 pixels. It is recommended that you edit your custom picture to be this size so your user picture is not distorted.
Taskbar UserTile is still in the pre-beta stage. So, you might encounter some bugs while using it. We tested it on a 32-bit Windows 7 virtual machine without a problem.


No comments:
Post a Comment