We have previously written about several tools for defragmenting your hard drive in Windows. See the following posts:
Download WinContig from
http://wincontig.mdtzone.it/en/index.htm.
NOTE: WinContig runs on Windows 2000, Windows XP, Windows Vista, and Windows 7. However, if you are any of the listed versions of Windows other than Windows 7, you have to be logged into an account that has full administration rights.
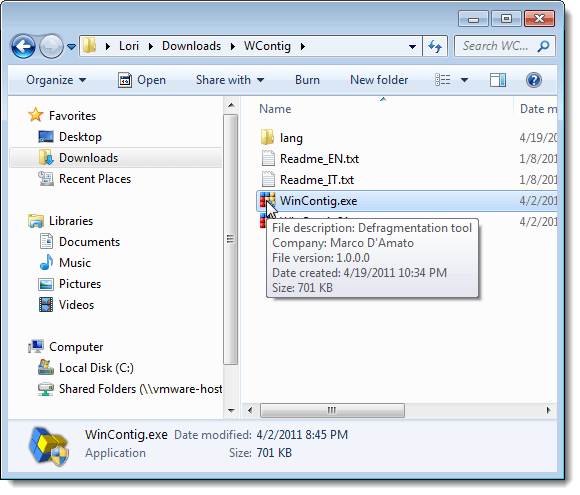
If the User Account Control dialog box displays, click Yes to continue.
NOTE: You may not see this dialog box, depending on your User Account Control settings. See our post, Windows 7 – How to configure UAC (User Account Control), for more information.
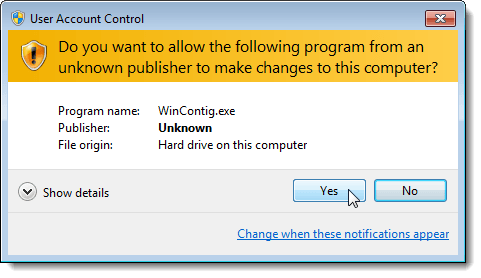
NOTE: You can select multiple files to add on the Add File(s) dialog box using the Shift and Ctrl keys just as you would in Windows Explorer.
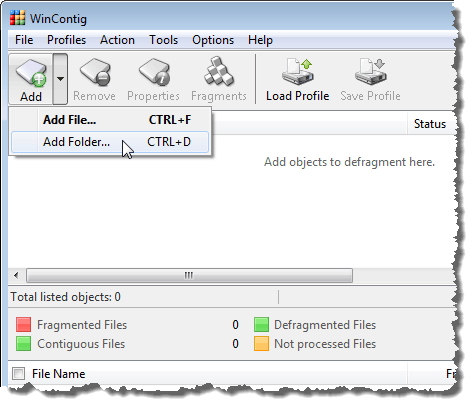
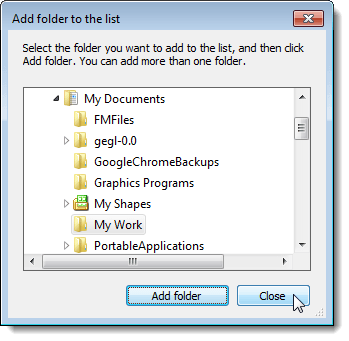
The Add folder to the list dialog box displays. Navigate to a folder you want to add and click Add folder.
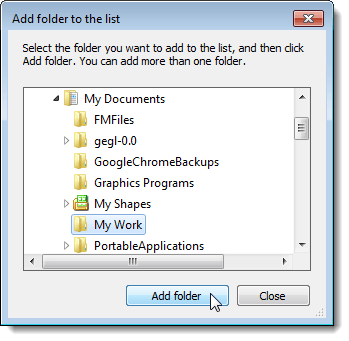
For your convenience, the Add folder to the list dialog box does not close automatically when you click Add folder, allowing you to add multiple folders, one after the other, without having to open the dialog box each time. When you have finished adding all the folders you want to add, click Close to close the dialog box.
The paths to the selected folders display in the list on the WinContig main window.
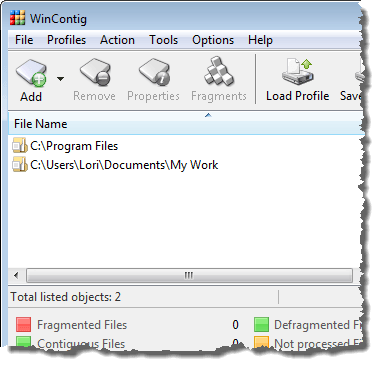
NOTE: To defragment an entire hard drive, use the Add Folders option on the Add button and select the hard drive root in the Add folder to the list dialog box.
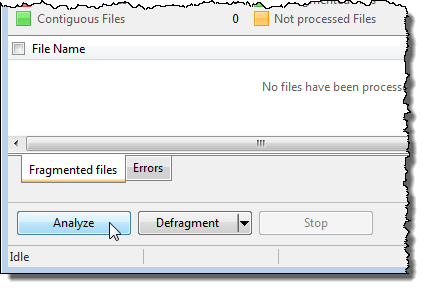
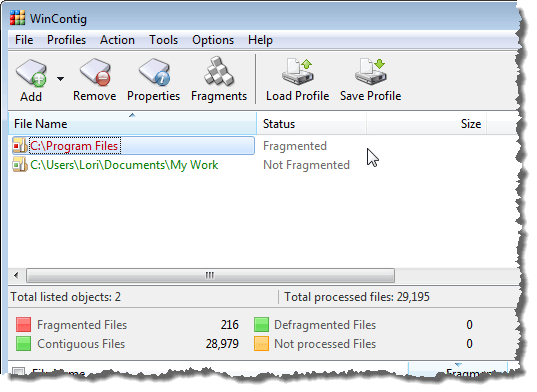
The condition of each file/folder displays in the Status column in the list. The text of the paths to the selected folders are also color-coded. Red indicates a file/folder is fragmented and green indicates a file/folder is not fragmented.
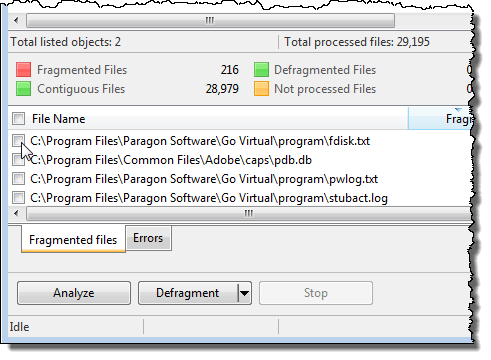
In this post, we covered adding files/folders to be defragmented, analyzing the selected files/folders, and selecting specific files to be defragmented.
Stay tuned for Part II, where we will cover defragmenting the selected files/folders, setting options, excluding files/folders, saving your profile, and automating WinContig.
Download WinContig from
http://wincontig.mdtzone.it/en/index.htm.
NOTE: WinContig runs on Windows 2000, Windows XP, Windows Vista, and Windows 7. However, if you are using any of the listed versions of Windows other than Windows 7, you have to be logged into an account that has full administration rights.
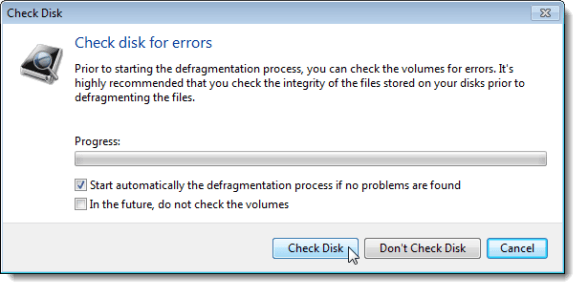
The Check Disk dialog box displays. WinContig recommends that you check the disk for errors before starting the defragmentation process. To do this, click the Check Disk button.
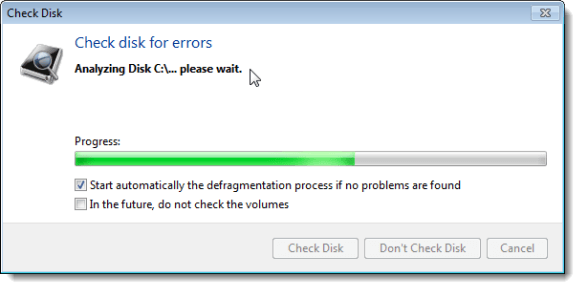
The progress of the disk check displays.
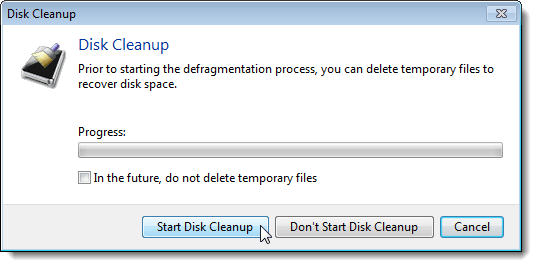
The Disk Cleanup dialog box displays. If you want to delete temporary files before starting the defragmentation process, click Start Disk Cleanup. Otherwise, click Don’t Start Disk Cleanup. You must click one of these two buttons to continue with the defragmentation process.
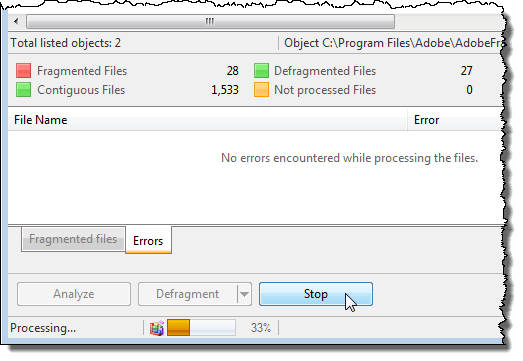
The progress of the defragmentation displays at the bottom of the WinContig main window. You can stop the process by clicking the Stop button.
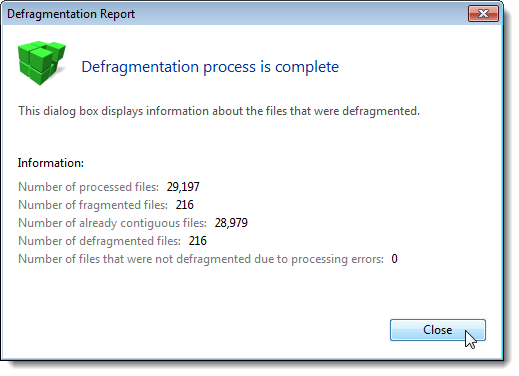
The Defragmentation Report dialog box displays once the process is complete. Information about the files that were defragmented is displayed. Click Close to close the dialog box and return to the WinContig main window.
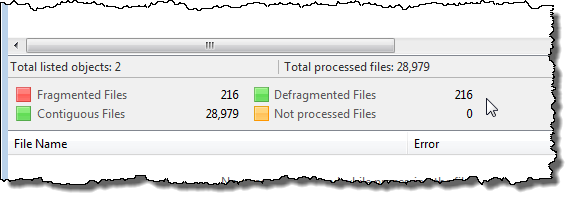
The number of files that were defragmented is listed in the middle of the WinContig main window. WinContig also tells you how many files were not processed, if applicable.
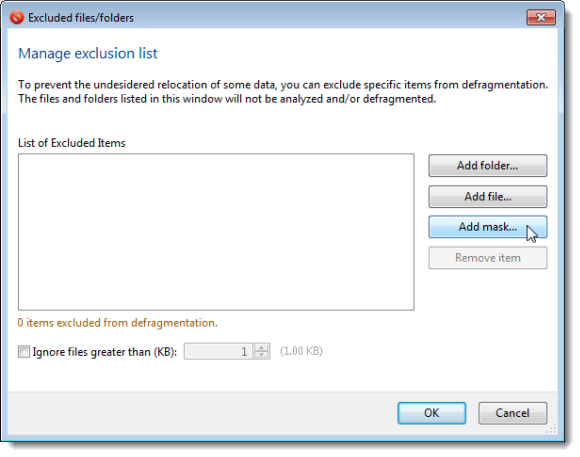
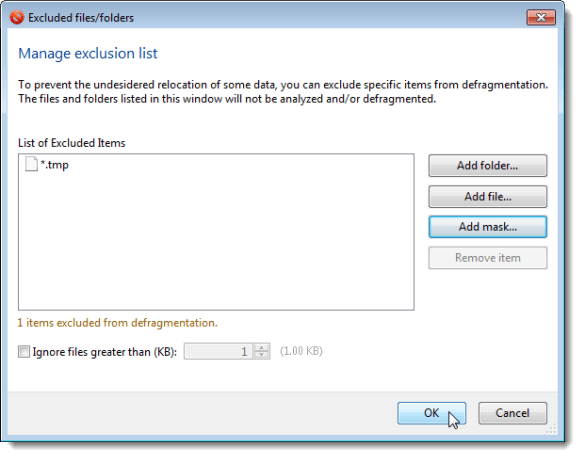
The Excluded files/folders dialog box displays. To exclude a certain folder or file, click Add folder or Add file, respectively. You can also exclude certain types of files using masks. To do this click Add mask.
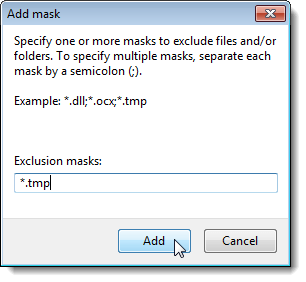
The Add mask dialog box displays. An example of how to add a mask is listed. For example, to avoid defragmenting all .tmp files, enter “*.tmp” (without the quotes) in the edit box. Click Add when you have finished entering the desired masks.
You are returned to the Excluded files/folders dialog box and the masks you entered are added to the List of Excluded Items. Click OK when you have finished entering your exclusions.
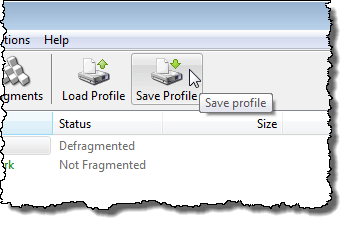
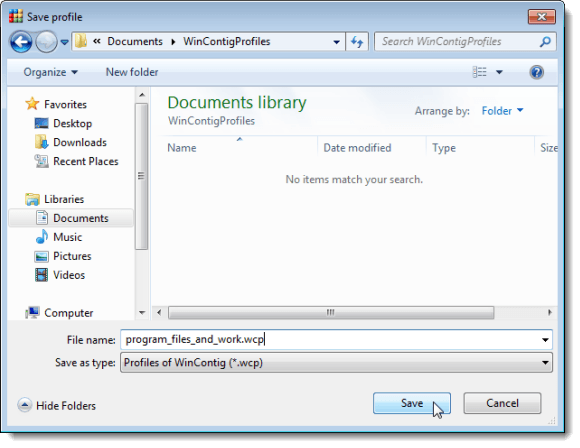
The Save Profile dialog box displays. Navigate to the location where you want to save your profile and enter a name for the file in the File name edit box, using the .wcp extension. Click Save.
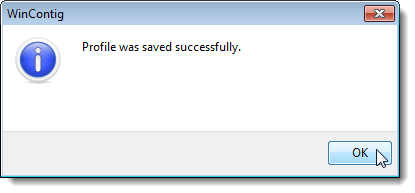
Once the profile has been saved, a dialog box displays telling you the save was successful. Click OK to close the dialog box and return to the WinContig main window.
To open your profile again for defragmentation, use the Load Profile button.
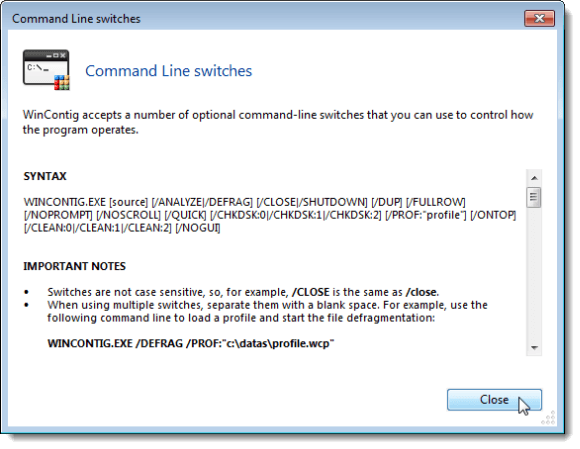
The Command Line switches dialog box displays. The syntax for using running WinContig on the command line displays along with a description of each option and some examples. Click Close to close the dialog box.
NOTE: If you want to schedule a script or batch file to run WinContig automatically, you can use a tool called pycron, that is an easy to use version of the Linux cron utility for Windows. We have found pycron to be more reliable than the Windows Task Scheduler. See our post, Replacing the Windows Task Scheduler, for details.
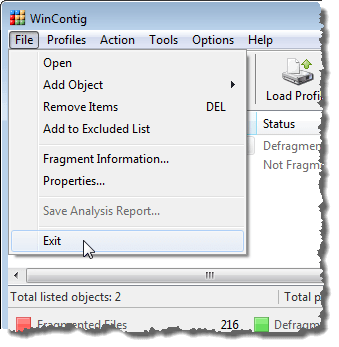
To close WinContig, select Exit from the File menu.
In Part I of this series, we covered adding files/folders to be defragmented, analyzing the selected files/folders, and selecting specific files to be defragmented.
WinContig is a great tool for IT consultants who must maintain many computers in different locations, due to its portability, fast and efficient analysis, and the speed of the defragmentation. It can be easily carried around on and run from a USB flash drive because it doesn’t create an installation directory or registry entries.
- SmartDefrag – Free disk defragmenter
- Defragment a single file using FragExt
- Defragmenting a Single File with Piriform Defraggler
Download WinContig from
http://wincontig.mdtzone.it/en/index.htm.
NOTE: WinContig runs on Windows 2000, Windows XP, Windows Vista, and Windows 7. However, if you are any of the listed versions of Windows other than Windows 7, you have to be logged into an account that has full administration rights.
Run WinContig
WinContig is a portable tool and does not require installation. To run WinContig, unzip the .zip file you downloaded and double-click on the .exe file.
If the User Account Control dialog box displays, click Yes to continue.
NOTE: You may not see this dialog box, depending on your User Account Control settings. See our post, Windows 7 – How to configure UAC (User Account Control), for more information.

Add Files/Folders to be Defragmented
For this example, we will defragment a couple of specific folders on our C: drive. You can also choose to defragment specific files. Click the down arrow on the Add button and select Add Folder from the drop-down menu. To add files, select Add File.NOTE: You can select multiple files to add on the Add File(s) dialog box using the Shift and Ctrl keys just as you would in Windows Explorer.

The Add folder to the list dialog box displays. Navigate to a folder you want to add and click Add folder.

For your convenience, the Add folder to the list dialog box does not close automatically when you click Add folder, allowing you to add multiple folders, one after the other, without having to open the dialog box each time. When you have finished adding all the folders you want to add, click Close to close the dialog box.

The paths to the selected folders display in the list on the WinContig main window.

NOTE: To defragment an entire hard drive, use the Add Folders option on the Add button and select the hard drive root in the Add folder to the list dialog box.
Analyze the Selected Files/Folders
To analyze the condition of the selected files/folders and find out if they need to be defragmented, click Analyze at the bottom of the WinContig main window.
The condition of each file/folder displays in the Status column in the list. The text of the paths to the selected folders are also color-coded. Red indicates a file/folder is fragmented and green indicates a file/folder is not fragmented.

Select Specific Files to be Defragmented
If you only want to defragment certain files within the selected folders, you can do so by selecting check boxes for the desired files in the bottom list of files.
Wrap Up
This was the first post in a two-part series about using WinContig to easily defragment your whole hard drive or just certain files.In this post, we covered adding files/folders to be defragmented, analyzing the selected files/folders, and selecting specific files to be defragmented.
Stay tuned for Part II, where we will cover defragmenting the selected files/folders, setting options, excluding files/folders, saving your profile, and automating WinContig.
Download WinContig from
http://wincontig.mdtzone.it/en/index.htm.
NOTE: WinContig runs on Windows 2000, Windows XP, Windows Vista, and Windows 7. However, if you are using any of the listed versions of Windows other than Windows 7, you have to be logged into an account that has full administration rights.
Defragment the Files/Folders
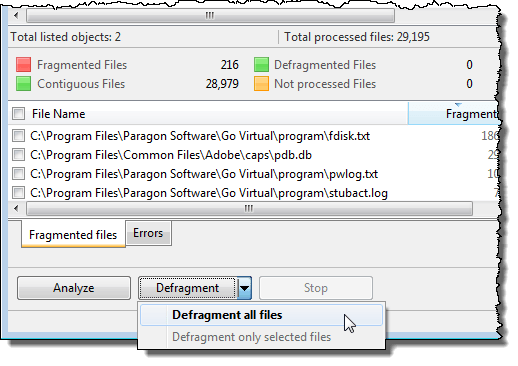
Once you have added files/folders and selected specific files, if desired, click the down arrow on the Defragment button and select Defragment all files or Defragment only selected files (if you are only defragmenting specific files). If you do not select any specific files, the Defragment only selected files option is not available.
The Check Disk dialog box displays. WinContig recommends that you check the disk for errors before starting the defragmentation process. To do this, click the Check Disk button.

The progress of the disk check displays.

The Disk Cleanup dialog box displays. If you want to delete temporary files before starting the defragmentation process, click Start Disk Cleanup. Otherwise, click Don’t Start Disk Cleanup. You must click one of these two buttons to continue with the defragmentation process.

The progress of the defragmentation displays at the bottom of the WinContig main window. You can stop the process by clicking the Stop button.

The Defragmentation Report dialog box displays once the process is complete. Information about the files that were defragmented is displayed. Click Close to close the dialog box and return to the WinContig main window.

The number of files that were defragmented is listed in the middle of the WinContig main window. WinContig also tells you how many files were not processed, if applicable.

Set Options in WinContig
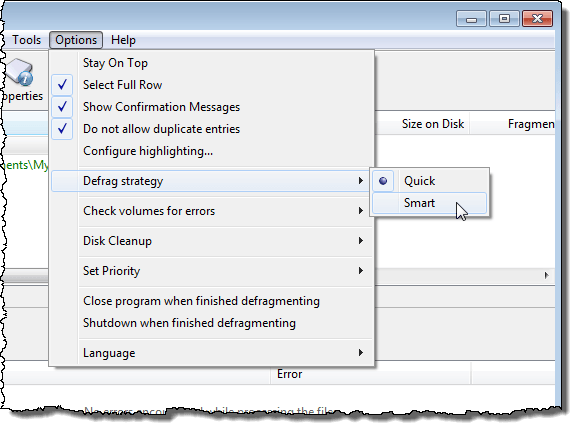
There are many options available on the Options menu, including whether you want to use the Quick defragmentation method or the Smart method. They describe the difference between the two methods in the FAQs on their website:WinContig supports two different defragmentation methods. If you choose the Quick method, WinContig does look for the first amount of free space large enough to defragment a file into and uses it. Use this defragmentation method if you use tools like Windows Defrag to defragment your hard disk on a regular basis. If you choose the Smart method, WinContig does look for the amount of free space that best fits a file into ad uses it. Also, if there is no free space large enough to fully defragment a file into, WinContig does try to reduce the number of fragments of that file.Explore the options to see how best to customize WinContig for your use.

Exclude Specific Files/Folders or File Types
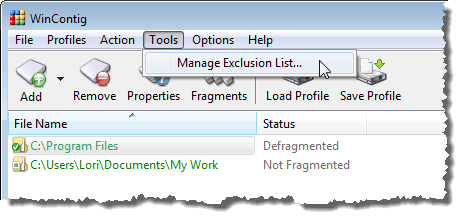
You can also exclude certain files, folders, or types of files from being defragmented. To do this, select Manage Exclusion List from the Tools menu.
The Excluded files/folders dialog box displays. To exclude a certain folder or file, click Add folder or Add file, respectively. You can also exclude certain types of files using masks. To do this click Add mask.

The Add mask dialog box displays. An example of how to add a mask is listed. For example, to avoid defragmenting all .tmp files, enter “*.tmp” (without the quotes) in the edit box. Click Add when you have finished entering the desired masks.

You are returned to the Excluded files/folders dialog box and the masks you entered are added to the List of Excluded Items. Click OK when you have finished entering your exclusions.

Save Your Profile
If you defragment the selected files and folders regularly, you might want to save the profile so you can easily load the selected files and folders to defragment the next time you want to do so. To do this, click Save Profile.
The Save Profile dialog box displays. Navigate to the location where you want to save your profile and enter a name for the file in the File name edit box, using the .wcp extension. Click Save.

Once the profile has been saved, a dialog box displays telling you the save was successful. Click OK to close the dialog box and return to the WinContig main window.
To open your profile again for defragmentation, use the Load Profile button.

Automate Defragmentation Using the Command Line
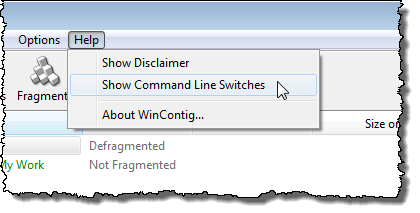
You can automate the defragmentation of a specific profile using a script or batch file and command line switches available for WinContig. To view a list of the command line switches available and an example on how to run WinContig using the command line, select Show Command Line Switches from the Help menu.
The Command Line switches dialog box displays. The syntax for using running WinContig on the command line displays along with a description of each option and some examples. Click Close to close the dialog box.
NOTE: If you want to schedule a script or batch file to run WinContig automatically, you can use a tool called pycron, that is an easy to use version of the Linux cron utility for Windows. We have found pycron to be more reliable than the Windows Task Scheduler. See our post, Replacing the Windows Task Scheduler, for details.

To close WinContig, select Exit from the File menu.

Wrap Up
In this post, we covered defragmenting the selected files/folders, setting options, excluding files/folders, saving your profile, and automating WinContig.In Part I of this series, we covered adding files/folders to be defragmented, analyzing the selected files/folders, and selecting specific files to be defragmented.
WinContig is a great tool for IT consultants who must maintain many computers in different locations, due to its portability, fast and efficient analysis, and the speed of the defragmentation. It can be easily carried around on and run from a USB flash drive because it doesn’t create an installation directory or registry entries.


No comments:
Post a Comment