
When using Ubuntu (which uses the GNOME desktop), and most similar Linux distributions, you’ll notice that video files and photos will show a small thumbnail image of the actual file, instead of just a generic item.
So do text files and some other files, such as fonts. This is helpful for quickly identifying, for instance, that single wallpaper you want to use, but that you aren’t sure of the name. Being able to glance at it and identify it by sight saves a lot of time which would otherwise be spent paging through possibly hundreds of images.
Sometimes, however, for whatever reason, something goes wrong and you end up with files that don’t have thumbnail images, but instead have generic file icons.
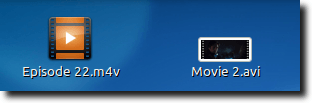
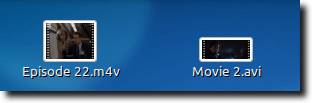
In the above image, we have two files, side by side on the Desktop. One has a thumbnail, while the other does not. How do we get a thumbnail for the file without one? The first instinct is likely to refresh your Desktop, but that doesn’t work, sadly.
The problem is that GNOME keeps a list of all the failed attempts at creating thumbnails, and from then on doesn’t attempt again, unless you change the file’s location or name. Obviously, moving all your files (or renaming them!), isn’t an option. What we need to do is delete the small images that are kept to identify failed attempts, so that the next time your computer “encounters” a file, it creates a new thumbnail.
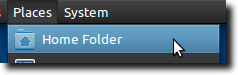
The first step is to open Nautilus (the default GNOME file browser), and navigate to your Home directory. The quickest way to do this is to navigate to the Places menu, then choose the Home option.
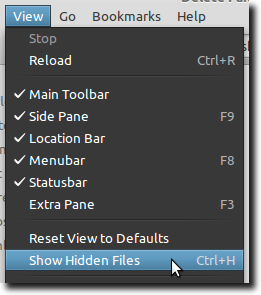
When your Home folder opens, you’ll only see a few folders (by default, with more if you’ve added them), but not any folders that seem remotely related to file thumbnails. That’s because the folder itself is hidden, so as not to create clutter (since you generally don’t need to interact with it). To make the thumbnails folder visible – and all other hidden folders along with it – hit Ctrl-H or choose the Show Hidden Files option in the View menu.
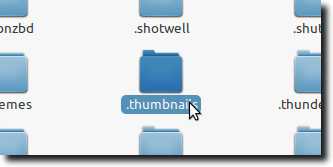
Now you should see dozens of “new” folders appear. The one we want is called “.thumbnails” (the “.” in front is what tells Nautilus to make it hidden by default), so navigate to it and open it by double-clicking.
Once opened, you’ll see two folders, one called fail and one called normal; the fail folder is the one we want.
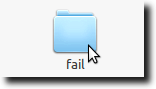
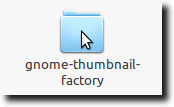
Inside this is at least one folder, called gnome-thumbnail-factory; double-click to open it.
You should now see placeholder images for all the files your system has attempted to create thumbnail images for, but failed. In this example, you’ll see that there were 260 items in the folder.
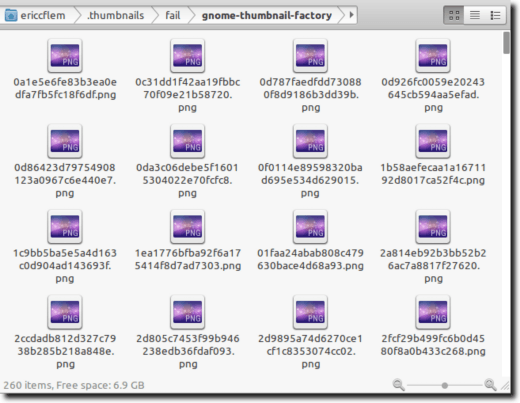
This means that in 260 instances, for 260 files, no thumbnail was created. This can happen for a few reasons. Sometimes the file itself is corrupt, while other times your system load was heavy while creating, saving or moving the file, so the thumbnail creation process timed out before the thumbnail could be created. Whatever the reason, that file is stuck with a generic icon.
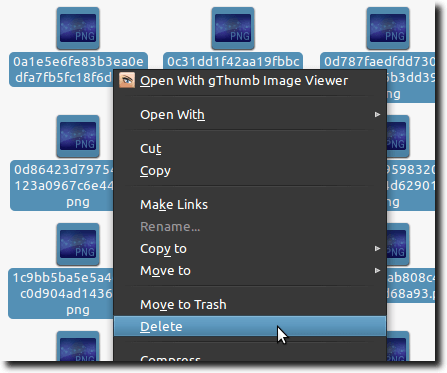
Now that we can see the placeholder images, simply highlight them all. Now right-click with the mouse on any of the items, and choose the Delete option (or Move To Trash, if you haven’t enabled the Delete option in the Nautilus preferences).
Okay. That’s it. Close down all your Nautilus windows and return to a file you know was previously missing a thumbnail. Look at it and see… what? It’s still missing the thumbnail? It is, but this is to be expected. Simply refresh your view by hitting the F5 key and new thumbnail images should be created for all files in your current directory that are currently missing them. If everything went according to plan, you should now see this:
Again, some files will fail to ever receive thumbnails. But making a habit to regularly empty your failed thumbnails folder of placeholder images will at the very least make it likely that you have as few “orphans” as possible.
So do text files and some other files, such as fonts. This is helpful for quickly identifying, for instance, that single wallpaper you want to use, but that you aren’t sure of the name. Being able to glance at it and identify it by sight saves a lot of time which would otherwise be spent paging through possibly hundreds of images.
Sometimes, however, for whatever reason, something goes wrong and you end up with files that don’t have thumbnail images, but instead have generic file icons.
In the above image, we have two files, side by side on the Desktop. One has a thumbnail, while the other does not. How do we get a thumbnail for the file without one? The first instinct is likely to refresh your Desktop, but that doesn’t work, sadly.
The problem is that GNOME keeps a list of all the failed attempts at creating thumbnails, and from then on doesn’t attempt again, unless you change the file’s location or name. Obviously, moving all your files (or renaming them!), isn’t an option. What we need to do is delete the small images that are kept to identify failed attempts, so that the next time your computer “encounters” a file, it creates a new thumbnail.
The first step is to open Nautilus (the default GNOME file browser), and navigate to your Home directory. The quickest way to do this is to navigate to the Places menu, then choose the Home option.
When your Home folder opens, you’ll only see a few folders (by default, with more if you’ve added them), but not any folders that seem remotely related to file thumbnails. That’s because the folder itself is hidden, so as not to create clutter (since you generally don’t need to interact with it). To make the thumbnails folder visible – and all other hidden folders along with it – hit Ctrl-H or choose the Show Hidden Files option in the View menu.
Now you should see dozens of “new” folders appear. The one we want is called “.thumbnails” (the “.” in front is what tells Nautilus to make it hidden by default), so navigate to it and open it by double-clicking.
Once opened, you’ll see two folders, one called fail and one called normal; the fail folder is the one we want.
Inside this is at least one folder, called gnome-thumbnail-factory; double-click to open it.
You should now see placeholder images for all the files your system has attempted to create thumbnail images for, but failed. In this example, you’ll see that there were 260 items in the folder.
This means that in 260 instances, for 260 files, no thumbnail was created. This can happen for a few reasons. Sometimes the file itself is corrupt, while other times your system load was heavy while creating, saving or moving the file, so the thumbnail creation process timed out before the thumbnail could be created. Whatever the reason, that file is stuck with a generic icon.
Now that we can see the placeholder images, simply highlight them all. Now right-click with the mouse on any of the items, and choose the Delete option (or Move To Trash, if you haven’t enabled the Delete option in the Nautilus preferences).
Okay. That’s it. Close down all your Nautilus windows and return to a file you know was previously missing a thumbnail. Look at it and see… what? It’s still missing the thumbnail? It is, but this is to be expected. Simply refresh your view by hitting the F5 key and new thumbnail images should be created for all files in your current directory that are currently missing them. If everything went according to plan, you should now see this:
Again, some files will fail to ever receive thumbnails. But making a habit to regularly empty your failed thumbnails folder of placeholder images will at the very least make it likely that you have as few “orphans” as possible.
No comments:
Post a Comment