
Here’s a nifty little utility that you can use to take any picture that is in BMP, JPG, or PNG format and convert it into BMP, JPG, PNG or ICO format. Using this program, you can take your favorite picture of your girlfriend, let’s say, and convert it into a Windows Icon. Then you can replace out your My Computer icon with her face rather than a boring computer! Hmmm or maybe you don’t want to see her that much…!!
Anyway, the program is called ImagIcon and it’s not only a tiny program, but it does it’s job very well. You can take an image and save it as an icon in all of the different sizes: 16×16, 32×32, 48×48, and 64×64. The 16×16 size can be used to give your web site a logo in the IE address bar. For example, in Blogger while writing a post, you can see the orange icon in the address bar:

The program also lets your transform the images if you like. You can scale the image to make it smaller or flip it horizontally or vertically. You can even save the icon with alpha transparency! And if you don’t care to save the image as an icon, you can convert between any of the three formats: PNG, JPG, or BMP.
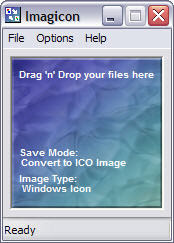
Simply drag a picture into the colored area after configuring your settings and the picture is automatically converted! Here I took a picture of my wife & I and dropped it onto the program window. By default, it converts the picture into an icon of 32×32 and puts it in the same folder as the original picture:

You can change the settings by click on the Options menu item. Icon Settings allows you to pick the size of your final icon. Image Transform lets you pick the transformations you want if you are converting between picture formats (JPG to PNG). Remember, you can convert to the same format and simply transform the picture also. So if you have a bunch of JPEG images and you simply want to scale them quickly, then in Save Mode choose JPEG and choose the settings for image transform. And of course Save Mode is the format that you want to convert to. Save Directory is if you want to have the pictures stored somewhere else other than the directory where the originals are located.
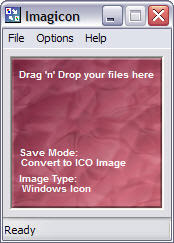
And lastly, you can customize ImagIcon itself by choosing different colors or by loading in your own custom image for the background!
Very nice program and very handy, especially for converting images into Windows icons!
Anyway, the program is called ImagIcon and it’s not only a tiny program, but it does it’s job very well. You can take an image and save it as an icon in all of the different sizes: 16×16, 32×32, 48×48, and 64×64. The 16×16 size can be used to give your web site a logo in the IE address bar. For example, in Blogger while writing a post, you can see the orange icon in the address bar:

The program also lets your transform the images if you like. You can scale the image to make it smaller or flip it horizontally or vertically. You can even save the icon with alpha transparency! And if you don’t care to save the image as an icon, you can convert between any of the three formats: PNG, JPG, or BMP.

Simply drag a picture into the colored area after configuring your settings and the picture is automatically converted! Here I took a picture of my wife & I and dropped it onto the program window. By default, it converts the picture into an icon of 32×32 and puts it in the same folder as the original picture:
You can change the settings by click on the Options menu item. Icon Settings allows you to pick the size of your final icon. Image Transform lets you pick the transformations you want if you are converting between picture formats (JPG to PNG). Remember, you can convert to the same format and simply transform the picture also. So if you have a bunch of JPEG images and you simply want to scale them quickly, then in Save Mode choose JPEG and choose the settings for image transform. And of course Save Mode is the format that you want to convert to. Save Directory is if you want to have the pictures stored somewhere else other than the directory where the originals are located.
And lastly, you can customize ImagIcon itself by choosing different colors or by loading in your own custom image for the background!

Very nice program and very handy, especially for converting images into Windows icons!
No comments:
Post a Comment