
Sigil is a fantastic piece of software (for Mac, Windows and Linux), that allows users to create and edit eBooks using the ePUB format. If you use an iPad or Nook, chances are you’ve been reading ePUB books on it. With Sigil, you can make your own. Here’s how.
But before we get started, we’ll need a text to convert. You can copy a long article from the Web, but for this example we’ll use “A Christmas Carol” by Charles Dickens. You can grab it from Project Gutenberg, a collection of tens of thousands of out of print, and out of copyright, books.
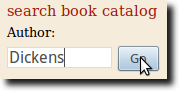
The first step is to find the book, so go to the search box at the above Project Gutenberg link, and search for Dickens (or whatever author you want).
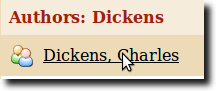
Now, choose your author from the list.
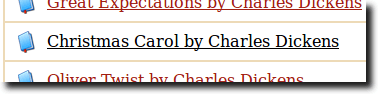
Once on the author page, browse through the books until you find one you want to convert.
Now, pick out the format to download. In this case, we’re downloading the plain text edition.

Note: obviously, Project Gutenberg makes books available in ePUB format, but for the sake of this tutorial, we’re pretending they don’t.
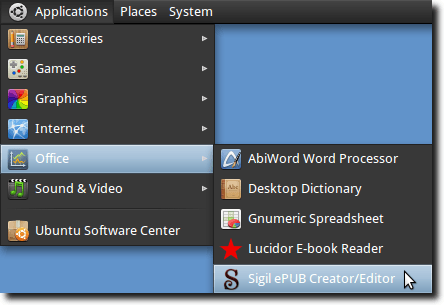
Once your book has downloaded, open Sigil. If you followed our previous tutorial for Linux, it’s under Office in the Applications menu. You’ll find it in your Applications folder on Mac OS X and in the Start menu in Windows.
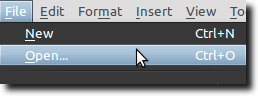
To get started, click the Open button or choose Open from the File menu.
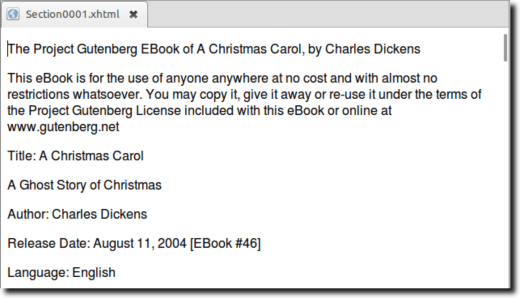
Sigil will load your document, and you’ll be able to see it in the main window. Sigil has two main views and one hybrid view. By default, you’ll see the text of the document, as if you were reading it from a page.
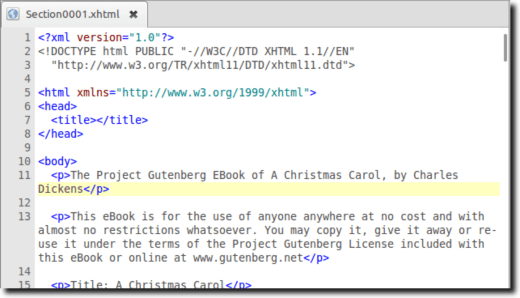
The other option for viewing is Sigil’s HTML view, where you can see the actual HTML code that makes up your document (even if you imported a plain text document, as we just did, Sigil will always convert it to HTML).
Finally, Sigil’s hybrid view, called Split view, offers a view of both.
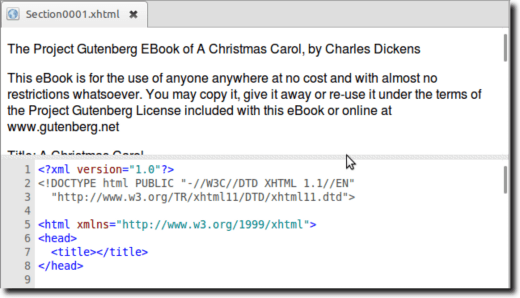
You can edit in either mode, and the changes will automatically appear in the other
For the most part, Sigil works like a word processor. Formatting options include bold, italics, underline and strikethrough. Text can be right justified, centered, left justified or full justified. You can use bullet or numbered lists. Finally, you can use the different HTML headings (Heading 1 being the largest, down to Heading 6, the smallest).

Once you get your document formatted the way you want, it’s time to save. And that’s it. You’ve just created an eBook.
A very basic eBook, that is. But Sigil is a lot more powerful than that. Here’s what else it can do.
With shorter stories or books, you might not need chapters, but try reading through a long novel without them! Sigil allows you to add chapter breaks, cover art, and will automatically create a table of contents for you.
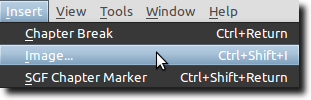
First, we’ll add cover art. Doesn’t matter where you find the image (Google Images is always a good first stop), but let’s say you’ve already downloaded it. To add it to your ePUB, simply place the cursor to where you’d like it to go, then go to the Insert menu and choose the Image option.
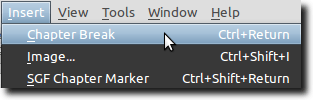
Choose your image from the file picker, and you should see it appear in the body of your document. You can treat it like text (as far as having it left justified, centered or right justified), and when you’re done, there are two things that need to be done in order for eBook readers to treat it as your book’s cover. The first is to create a chapter break. Move the cursor so that it is immediately following the image, return to the Insert menu and choose Chapter Break.
When we this, two things happen. The first is that under the Text folder (in the Book Browser), we now have two xhtml documents. The first is now our cover image, and the second is the rest of the text. Each time you add a chapter break, Sigil splits the book into different chunks. Second, in the Images folder (also in the Book Browser), you’ll see the image you just inserted.

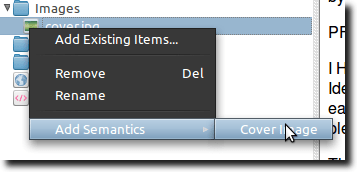
To have that image identified as the cover, right-click the image (in the Book Browser), go down to Add Semantics, and choose Cover Image. This tells Sigil that the image isn’t “just” an image, but our cover.
To finish off the rest of the book (both chapters and table of contents), let’s return to the text. A printed book generally has different specialized pages, such as the title page, author page and table of contents. An eBook can have those, or not. If you want to have the title and author alone on a page, simply place the cursor after the text you want to separate, navigate to the Insert menu, just as before, and choose Chapter Break, just as before.
Note: you can also use the Chapter Break button in the toolbar.
In this instance, we’ve isolated the following text onto its own page.

To have Sigil identify this as a new chapter (even beyond the Insert Chapter Break), place the cursor on the top line (“A Christmas Carol”), and use the heading tool. Since this is the title of the book, Heading 1 seems appropriate.
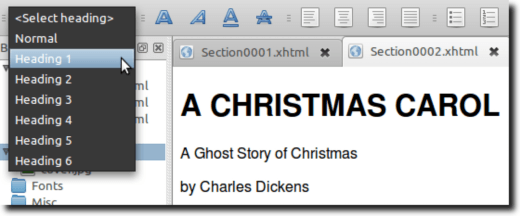
As you can see, doing so put “A Christmas Carol” in large, bold text.
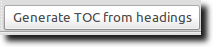
Do this for the rest of the book whenever you want a chapter break to appear. With “A Christmas Carol” (not that this will be useful for other books), there are five staves that make nice break points. Once you’ve identified all of them as chapter breaks, click the Generate TOC from headings button in the Table of Contents sidebar.
This will bring up the Heading Selector window.
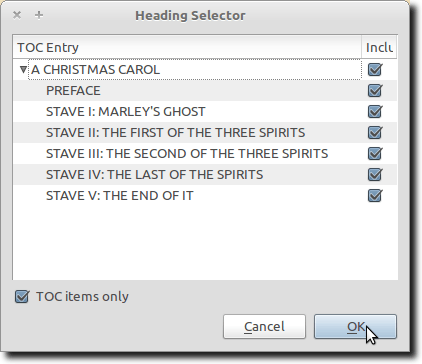
If you have multiple headings within each chapter, they may be unchecked, so that Sigil doesn’t treat them each as a separate chapter.
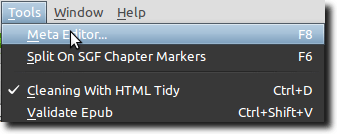
Now there’s only one thing left to do (if you want). Your eBook can contain metadata that eBook readers use to display information about the book, beyond what can be found in the title. To edit this information, choose Meta Editor from the Tools menu.
This will bring up the Meta Editor window, where you can enter the name of the book, the author and the book’s language.
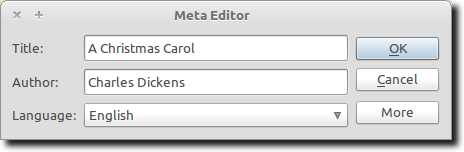
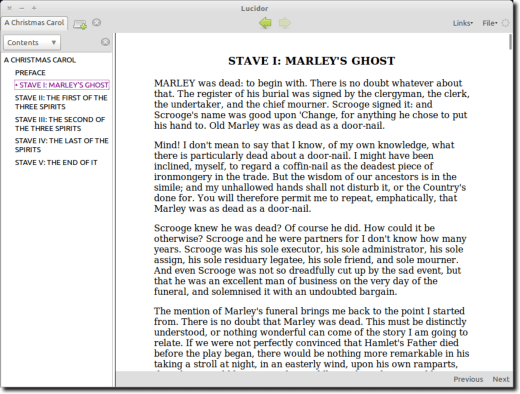
Click the More button to add even more data, such as publisher, publication date, copyright information, and more. When you’re finished, click the Save button once more, and that’s it! You can now read your ePUB in a device or computer software, like Lucidor.
If you have a reading device that supports the ePUB standard, such as a Nook or iPad, your new book can be added to it and you can enjoy it whenever you want.
But before we get started, we’ll need a text to convert. You can copy a long article from the Web, but for this example we’ll use “A Christmas Carol” by Charles Dickens. You can grab it from Project Gutenberg, a collection of tens of thousands of out of print, and out of copyright, books.
The first step is to find the book, so go to the search box at the above Project Gutenberg link, and search for Dickens (or whatever author you want).
Now, choose your author from the list.
Once on the author page, browse through the books until you find one you want to convert.
Now, pick out the format to download. In this case, we’re downloading the plain text edition.
Note: obviously, Project Gutenberg makes books available in ePUB format, but for the sake of this tutorial, we’re pretending they don’t.
Once your book has downloaded, open Sigil. If you followed our previous tutorial for Linux, it’s under Office in the Applications menu. You’ll find it in your Applications folder on Mac OS X and in the Start menu in Windows.
To get started, click the Open button or choose Open from the File menu.
Sigil will load your document, and you’ll be able to see it in the main window. Sigil has two main views and one hybrid view. By default, you’ll see the text of the document, as if you were reading it from a page.
The other option for viewing is Sigil’s HTML view, where you can see the actual HTML code that makes up your document (even if you imported a plain text document, as we just did, Sigil will always convert it to HTML).
Finally, Sigil’s hybrid view, called Split view, offers a view of both.
You can edit in either mode, and the changes will automatically appear in the other
For the most part, Sigil works like a word processor. Formatting options include bold, italics, underline and strikethrough. Text can be right justified, centered, left justified or full justified. You can use bullet or numbered lists. Finally, you can use the different HTML headings (Heading 1 being the largest, down to Heading 6, the smallest).
Once you get your document formatted the way you want, it’s time to save. And that’s it. You’ve just created an eBook.
A very basic eBook, that is. But Sigil is a lot more powerful than that. Here’s what else it can do.
With shorter stories or books, you might not need chapters, but try reading through a long novel without them! Sigil allows you to add chapter breaks, cover art, and will automatically create a table of contents for you.
First, we’ll add cover art. Doesn’t matter where you find the image (Google Images is always a good first stop), but let’s say you’ve already downloaded it. To add it to your ePUB, simply place the cursor to where you’d like it to go, then go to the Insert menu and choose the Image option.
Choose your image from the file picker, and you should see it appear in the body of your document. You can treat it like text (as far as having it left justified, centered or right justified), and when you’re done, there are two things that need to be done in order for eBook readers to treat it as your book’s cover. The first is to create a chapter break. Move the cursor so that it is immediately following the image, return to the Insert menu and choose Chapter Break.
When we this, two things happen. The first is that under the Text folder (in the Book Browser), we now have two xhtml documents. The first is now our cover image, and the second is the rest of the text. Each time you add a chapter break, Sigil splits the book into different chunks. Second, in the Images folder (also in the Book Browser), you’ll see the image you just inserted.
To have that image identified as the cover, right-click the image (in the Book Browser), go down to Add Semantics, and choose Cover Image. This tells Sigil that the image isn’t “just” an image, but our cover.
To finish off the rest of the book (both chapters and table of contents), let’s return to the text. A printed book generally has different specialized pages, such as the title page, author page and table of contents. An eBook can have those, or not. If you want to have the title and author alone on a page, simply place the cursor after the text you want to separate, navigate to the Insert menu, just as before, and choose Chapter Break, just as before.
Note: you can also use the Chapter Break button in the toolbar.
In this instance, we’ve isolated the following text onto its own page.
To have Sigil identify this as a new chapter (even beyond the Insert Chapter Break), place the cursor on the top line (“A Christmas Carol”), and use the heading tool. Since this is the title of the book, Heading 1 seems appropriate.
As you can see, doing so put “A Christmas Carol” in large, bold text.
Do this for the rest of the book whenever you want a chapter break to appear. With “A Christmas Carol” (not that this will be useful for other books), there are five staves that make nice break points. Once you’ve identified all of them as chapter breaks, click the Generate TOC from headings button in the Table of Contents sidebar.
This will bring up the Heading Selector window.
If you have multiple headings within each chapter, they may be unchecked, so that Sigil doesn’t treat them each as a separate chapter.
Now there’s only one thing left to do (if you want). Your eBook can contain metadata that eBook readers use to display information about the book, beyond what can be found in the title. To edit this information, choose Meta Editor from the Tools menu.
This will bring up the Meta Editor window, where you can enter the name of the book, the author and the book’s language.
Click the More button to add even more data, such as publisher, publication date, copyright information, and more. When you’re finished, click the Save button once more, and that’s it! You can now read your ePUB in a device or computer software, like Lucidor.
If you have a reading device that supports the ePUB standard, such as a Nook or iPad, your new book can be added to it and you can enjoy it whenever you want.
You could add a simple .css file in the styles folder that will automatically give you paragraph indents also to make it more "read friendly".
ReplyDelete