The first time you use apt-get, it will probably be to make sure you’ve received all the pertinent software updates that are available. To do this, open a Terminal and type the following:
sudo apt-get update
This could take a while, and you’ll likely see something like this, as it checks your files and downloads updates to your software lists.
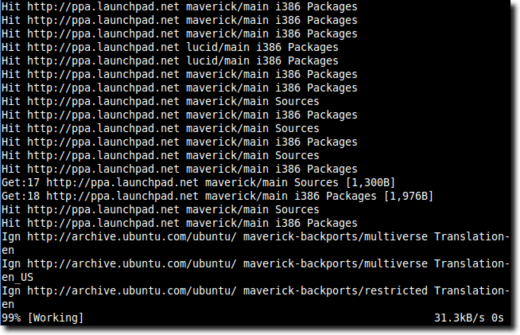
This command tells your system to run apt-get as the root user, and to update its software archives, which keep a record of versions and names of software that you have in your sources.list file.
When the updating is finished, type the following command:
sudo apt-get upgrade
When you do, apt-get checks for all your installed packages that have updates available. You’ll see something like this, which will show you all the updatable files, how much you will need to download, and how much extra space the updated packages will take up on your system.
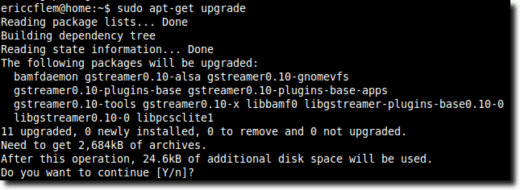
You may notice that some packages have been left back during the sudo apt-get update operation. This is because those packages have new requirements or are part of a new distribution upgrade.
When upgrading versions of Ubuntu (for instance, from Maverick to Natty), you’ll see this, but also when a program you have installed requires a library or other requisite program it didn’t require when you installed it. To get those new requirements, or to upgrade versions of Ubuntu, type the following:
sudo apt-get dist-upgrade
This will go through the exact same process as before, and when you’re finished, all the programs on your computer will have been updatd to the newest versions available in your package lists.
Let’s say you want to install Thunderbird, the Mozilla email client. Installing it is as simple as typing the following:
sudo apt-get install thunderbird
After it scans your packages, you’ll see something like this:
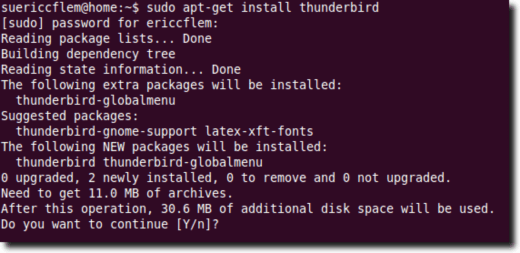
As you can see, in addition to installing Thunderbird, apt-get is also installing another package. Called “thunderbird-globalmenu,” this package allows Thunderbird to use Ubuntu’s new Global Menu applet. This is installed automatically, since the package is recommended, and Ubuntu now installs all recommended packages by default. If you want to install only Thunderbird, you would type the following:
sudo apt-get –no-install-recommends thunderbird
This would install Thunderbird immediately, without even waiting for confirmation, as we’ve seen before. This is because apt-get only asks for confirmation when packages other than what you request will be installed. In some instances, even when using the “–no-install-recommends” modifier, apt-get will still install other libraries, as they are required for the program you want to install to operate.
And then there are the suggested packages. If you go back to the screenshot under the original “sudo apt-get install thunderbird” command, you can see that apt-get is suggesting thunderbird-gnome-support and latex-xft-fonts, which are not required for Thunderbird to run, and are not even as highly suggested as to be in the “recommended” category, but may improve Thunderbird. If you want, you can go back later and install them as well.
sudo apt-get remove totem
This would result in two additional files, totem-mozilla and totem-plugins, being removed as well. This is because those files require Totem to be installed, so with Totem being removed, they are removed as well.

When you remove a program following this command, you leave behind any configuration options the program may have created. This is handy if you think you’ll be installing it again at a later point, but in many instances will just be “junk” left behind. To remove it along with the program, add the “–purge” modifer, like so:
sudo apt-get remove totem –purge
This doesn’t really change the behavior, but you will notice asterisks behind each item to be removed, indicating that the program, along with its configuration files, will be removed.
As mentioned, this is just a simple tutorial for beginning users who are new to apt-get and all that it can do. If you want to get a more in-depth look, check out the apt-get help file by typing the following into a Terminal:
apt-get –help
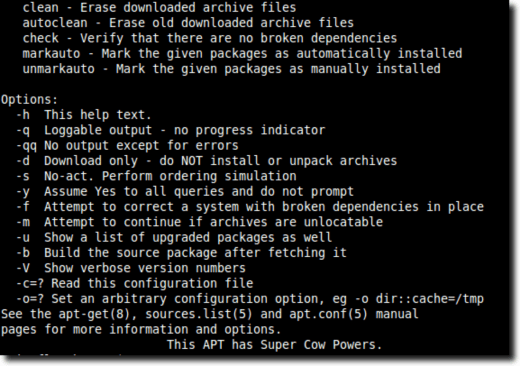
This will present you with the shorthand manual for apt-get, without any real detail.
Or, for something with more detail, type the following, also in the Terminal:
man apt-get
This will give you the apt-get manual.
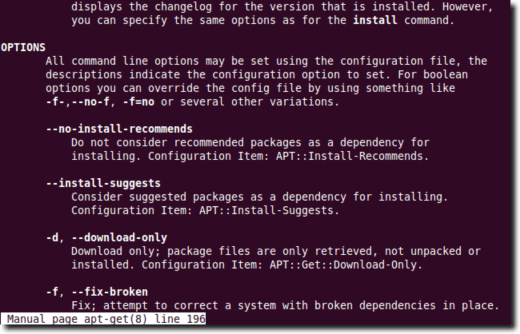
The manual, which can also be found online, is filled with information on syntax, plus in-depth explanations on what each option does and how it will affect the installation or removal of packages.
And that’s it. If this was your first attempt at using apt-get to install programs, you’re certainly not a “pro” at it after this guide, but you should have a basic understanding of how it works, and what’s happening when you use it.
sudo apt-get update
This could take a while, and you’ll likely see something like this, as it checks your files and downloads updates to your software lists.

This command tells your system to run apt-get as the root user, and to update its software archives, which keep a record of versions and names of software that you have in your sources.list file.
When the updating is finished, type the following command:
sudo apt-get upgrade
When you do, apt-get checks for all your installed packages that have updates available. You’ll see something like this, which will show you all the updatable files, how much you will need to download, and how much extra space the updated packages will take up on your system.

You may notice that some packages have been left back during the sudo apt-get update operation. This is because those packages have new requirements or are part of a new distribution upgrade.
When upgrading versions of Ubuntu (for instance, from Maverick to Natty), you’ll see this, but also when a program you have installed requires a library or other requisite program it didn’t require when you installed it. To get those new requirements, or to upgrade versions of Ubuntu, type the following:
sudo apt-get dist-upgrade
This will go through the exact same process as before, and when you’re finished, all the programs on your computer will have been updatd to the newest versions available in your package lists.
Installing New Programs
In addition to simply updating what’s already there, apt-get lets you install new packages. It doesn’t let you search quite as easily as the Ubuntu Software Center or Synapt-getic does, but if you know what you’re looking for, it’s pretty simple.Let’s say you want to install Thunderbird, the Mozilla email client. Installing it is as simple as typing the following:
sudo apt-get install thunderbird
After it scans your packages, you’ll see something like this:

As you can see, in addition to installing Thunderbird, apt-get is also installing another package. Called “thunderbird-globalmenu,” this package allows Thunderbird to use Ubuntu’s new Global Menu applet. This is installed automatically, since the package is recommended, and Ubuntu now installs all recommended packages by default. If you want to install only Thunderbird, you would type the following:
sudo apt-get –no-install-recommends thunderbird
This would install Thunderbird immediately, without even waiting for confirmation, as we’ve seen before. This is because apt-get only asks for confirmation when packages other than what you request will be installed. In some instances, even when using the “–no-install-recommends” modifier, apt-get will still install other libraries, as they are required for the program you want to install to operate.
And then there are the suggested packages. If you go back to the screenshot under the original “sudo apt-get install thunderbird” command, you can see that apt-get is suggesting thunderbird-gnome-support and latex-xft-fonts, which are not required for Thunderbird to run, and are not even as highly suggested as to be in the “recommended” category, but may improve Thunderbird. If you want, you can go back later and install them as well.
Removing Installed Software
Finally, we can use apt-get to remove software that is currently installed. Let’s say we don’t want to use Totem, the default media player, any longer. You would type the following:sudo apt-get remove totem
This would result in two additional files, totem-mozilla and totem-plugins, being removed as well. This is because those files require Totem to be installed, so with Totem being removed, they are removed as well.

When you remove a program following this command, you leave behind any configuration options the program may have created. This is handy if you think you’ll be installing it again at a later point, but in many instances will just be “junk” left behind. To remove it along with the program, add the “–purge” modifer, like so:
sudo apt-get remove totem –purge
This doesn’t really change the behavior, but you will notice asterisks behind each item to be removed, indicating that the program, along with its configuration files, will be removed.
As mentioned, this is just a simple tutorial for beginning users who are new to apt-get and all that it can do. If you want to get a more in-depth look, check out the apt-get help file by typing the following into a Terminal:
apt-get –help
This will present you with the shorthand manual for apt-get, without any real detail.

Or, for something with more detail, type the following, also in the Terminal:
man apt-get
This will give you the apt-get manual.

The manual, which can also be found online, is filled with information on syntax, plus in-depth explanations on what each option does and how it will affect the installation or removal of packages.
And that’s it. If this was your first attempt at using apt-get to install programs, you’re certainly not a “pro” at it after this guide, but you should have a basic understanding of how it works, and what’s happening when you use it.


No comments:
Post a Comment