
Sometimes, digital photos or scans end up looking a little washed out. Other times they appear too green, or blue, or red. Often this is caused by strange lighting conditions, but whatever the cause, photos can often be fixed, to a certain degree, by changing the white or black balance.
In this how-to, we’ll use The GIMP, a popular photo editing software application. The GIMP is free and open source, and can be downloaded from the project’s website. Users of most popular Linux distributions should be able to download it from their software repositories with a single command. In Ubuntu, The GIMP can be installed this way:
sudo apt-get install gimp
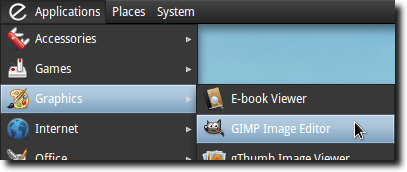
Once installed, The GIMP can be found under Graphics, in the Applications menu.
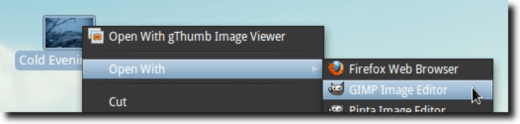
To adjust the white/black balance of an image, we’ll need to open it in The GIMP. To do so, either open The GIMP first, then open the photo using The GIMP’s File menu, or right-click the image and choose Open With, and then select The GIMP.
 Once the photo has loaded, you’ll find the option we want under the Colors menu; the option is called Levels.
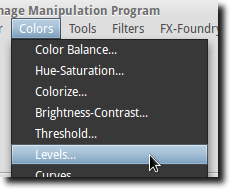 Once selected, a new window will appear.
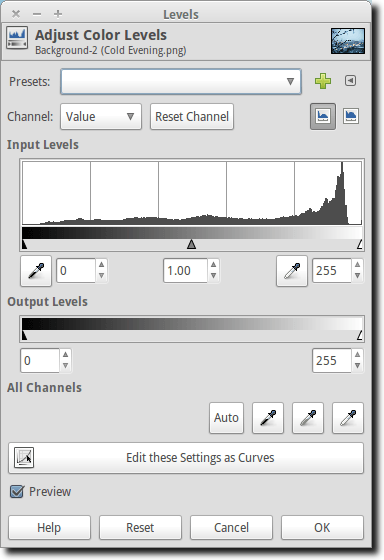 With this tool, you can adjust both the white and black levels of an image. What you’re doing, in effect, is clicking on a portion of the image you know should be white (or black or gray), and telling The GIMP to perform a similar adjustment to the rest of the picture. Therefore, if the “white” you clicked on needed to be adjusted by “x” amount, then the rest of the colors in the picture should be adjusted by the same amount, and when doing a black level adjustment, the same idea applies.
The Levels tool is very powerful, and you can get as fine-grained as adjusting the red, blue and green channels independently, or you can adjust everything at once. Adjusting channels one by one is a bit outside the scope of this tutorial, so we’ll just use the All Channels option, found at the bottom of the Levels window.
 There are three eye droppers available, as well as an Auto function. Clicking the Auto button will tell The GIMP to do its best to select what it feels “should” be white, and gray, and black, but making the determinations yourself will often, with practice, lead to better results.
As an aside, this is the image we’ll be adjusting today.
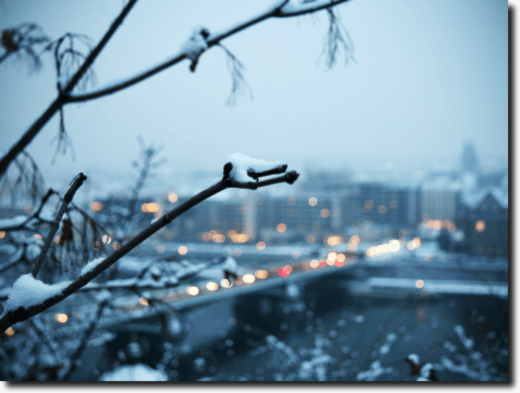 It is a background image shipped with elementary OS, and it’s also likely that the original levels were tweaked to give it a bluish haze.
Note: Our adjusting them here isn’t meant to imply the image was shoddy, just that adjusting the color levels would give a more true representation of the original image. As it was shipped, the blue-tinted image makes a great wallpaper!
Our first step is to adjust the black levels. This is the far-left of the three eye droppers. To pick a black point (the color in the image we feel should be pure black), click the eye dropper, then click something on the image that should be black.
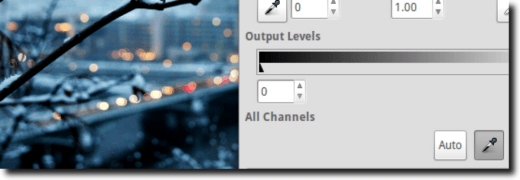 We picked a branch in the foreground. As you can see, once we clicked the branch, which was a little lighter than pure black, so was adjusted to be darker, the rest of the picture darkened as well.
Now, we’ll pick the gray point. To do this, click the middle eye dropper, then something gray on the image.
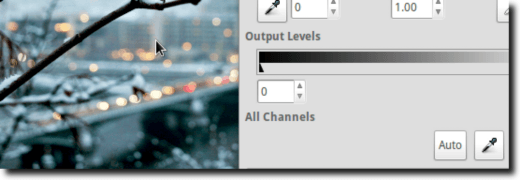 For this, we chose a part of the building in the background. Another good choice would have been the sky in the upper left corner of the image. Determining “gray” is a bit more nebulous than “black” or “white” but with a bit of trial and error, you’ll get the hang of it.
Finally, we need to tell The GIMP what in the image should be white, but isn’t. To do this, click the far right eye dropper, then click something white in the image.
The obvious target here, and the one we chose, was the snow resting on the branches in the foreground. As the snow was a bit gray, this immediately brightened the entire image, resulting in our final product.
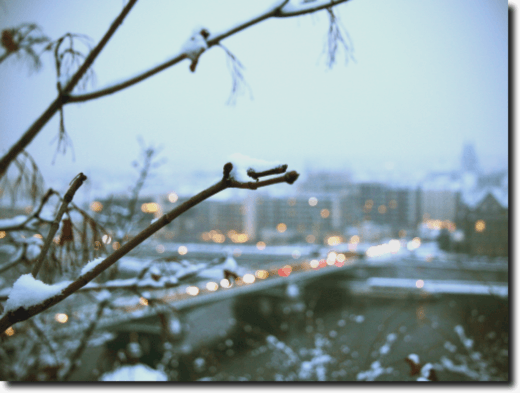 In this case, we think, all three adjustments resulted in an image that, while it might not make a great wallpaper image, is probably fairly true to the original photograph. But there’s not a lot of difference, which is great. Because that’s kind of the goal here; when something makes your image look overcast or a bit bland, this tool can help you perk it up. It won’t fix images that are way out of whack, but it can nudge a good photograph to be great.
The results here aren’t necessarily “perfect” by anyone’s definition. There was some detail loss, and because of what was likely other post-processing, some areas of the photo are a bit too dark, while others tend to bloom from too much brightness. Still, these steps are great giving a bit of life to old, washed out images.
In this how-to, we’ll use The GIMP, a popular photo editing software application. The GIMP is free and open source, and can be downloaded from the project’s website. Users of most popular Linux distributions should be able to download it from their software repositories with a single command. In Ubuntu, The GIMP can be installed this way:
sudo apt-get install gimp
Once installed, The GIMP can be found under Graphics, in the Applications menu.
To adjust the white/black balance of an image, we’ll need to open it in The GIMP. To do so, either open The GIMP first, then open the photo using The GIMP’s File menu, or right-click the image and choose Open With, and then select The GIMP.
The Levels tool is very powerful, and you can get as fine-grained as adjusting the red, blue and green channels independently, or you can adjust everything at once. Adjusting channels one by one is a bit outside the scope of this tutorial, so we’ll just use the All Channels option, found at the bottom of the Levels window.
As an aside, this is the image we’ll be adjusting today.
Note: Our adjusting them here isn’t meant to imply the image was shoddy, just that adjusting the color levels would give a more true representation of the original image. As it was shipped, the blue-tinted image makes a great wallpaper!
Our first step is to adjust the black levels. This is the far-left of the three eye droppers. To pick a black point (the color in the image we feel should be pure black), click the eye dropper, then click something on the image that should be black.
Now, we’ll pick the gray point. To do this, click the middle eye dropper, then something gray on the image.
Finally, we need to tell The GIMP what in the image should be white, but isn’t. To do this, click the far right eye dropper, then click something white in the image.
The obvious target here, and the one we chose, was the snow resting on the branches in the foreground. As the snow was a bit gray, this immediately brightened the entire image, resulting in our final product.
The results here aren’t necessarily “perfect” by anyone’s definition. There was some detail loss, and because of what was likely other post-processing, some areas of the photo are a bit too dark, while others tend to bloom from too much brightness. Still, these steps are great giving a bit of life to old, washed out images.
No comments:
Post a Comment