
In the past, we’ve discussed different ways to take screenshots from the Terminal in Linux. Linux, whether using GNOME, KDE or Xfce, also comes with GUI methods for taking screenshots. GNOME has gnome-screenshot (called Take Screenshot in the menus), KDE has KSnapshot, and Xfce offers both the standard Screenshooter application and a panel plugin. These offerings are all well and good, but are all fairly basic. While Mac and Windows users can take advantage of any number of screenshot utilities offering more advanced features, Linux users have been left out in the cold.
Until Shutter came along, that is. Shutter is a screenshot tool that all Linux users can take advantage of, offering not only the ability to take full Desktop screenshots, but single window, menu, tooltip and selection-based screenshots as well. Shutter can also act as a very capable screenshot editor, and when you’re done, can be used to upload your image to a variety of web hosts.
sudo apt-get install shutter
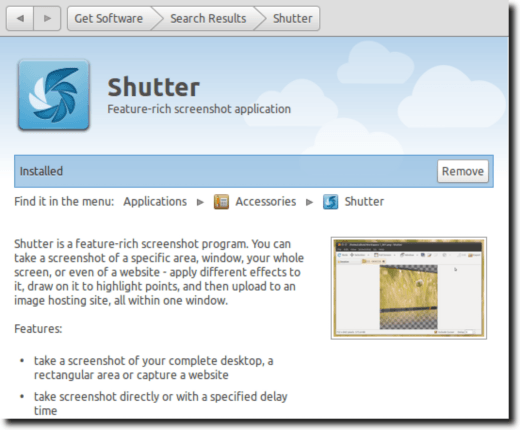
You will also be able to find it in the Ubuntu Software Center.
 Of course, if you aren’t using the newest version of Ubuntu, a personal package archive (PPA) is available. To add it to your sources.list file, type the following into a Terminal:
sudo apt-add-repository ppa:shutter/ppa
Then, type the following command to update your software lists:
sudo apt-get update
Finally, install it, using the first command:
sudo apt-get install shutter
Your computer will now download and install Shutter; it should be ready in just a few seconds, depending on your Internet speed.
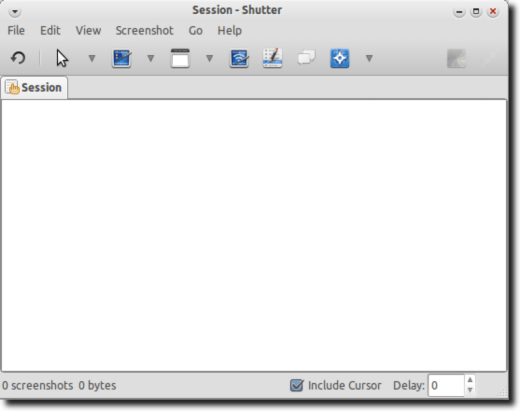
 Launch it, and the Shutter icon will appear in your notification area and the main window will open. Here is the main window:
 Here is the list of options available from the notification icon (just right-click the notification icon to view this menu).
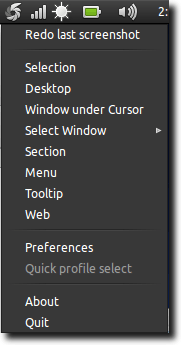 The simplest way to use Shutter (aside from the keyboard options discussed later), is by accessing its features via the notification icon. Here you can take a screenshot of a selection you want, the entire screen, a single window or section of a window, a menu, a tooltip or a web page.
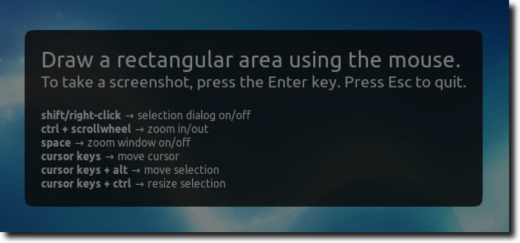
Just select the option you want from a window. If you need to do anything else (drag to select your desired area, choose a window or section, etc.), you’ll receive visual cues. For instance, this is the interface you’ll see when selecting a part of the screen to capture.
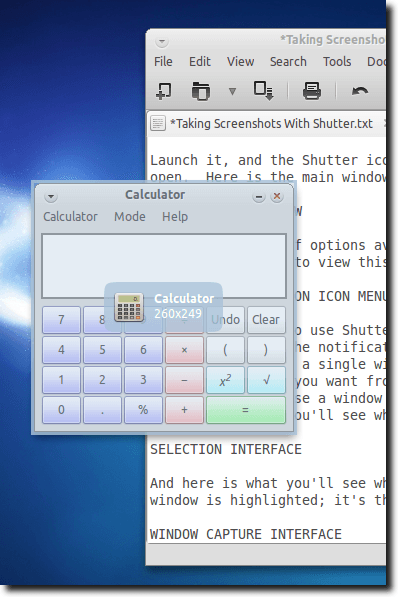
 And here is what you’ll see when choosing which window to capture. Notice how the calculator window is highlighted; it’s the window about to be captured.
 Your screenshot will now open in the Shutter Drawing Tool, which is an incredibly powerful interface, made even moreso when considering that it’s bundled with a “simple” screenshot tool!
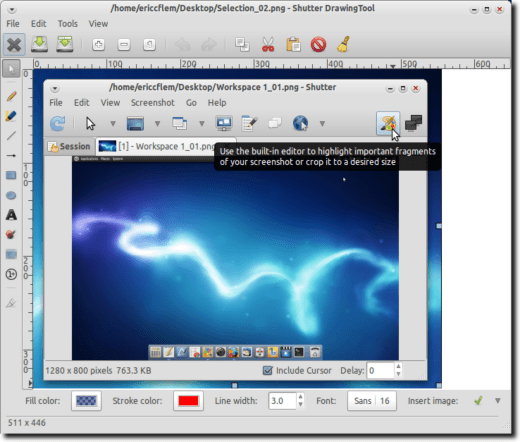 In addition to basic rotate, crop, and resize tools, the Shutter Drawing Tool also offers the ability to draw on your screenshots (freehand), to add text, shapes, arrows, pixelize sensitive information (such as phone numbers or email addresses), and more. There’s too much to get into in this guide, but suffice it to say, while it will never be confused with Photoshop or The GIMP, the Shutter Drawing Tool offers more than enough power for editing your screenshots.
Shutter also offers a huge Preferences interface.
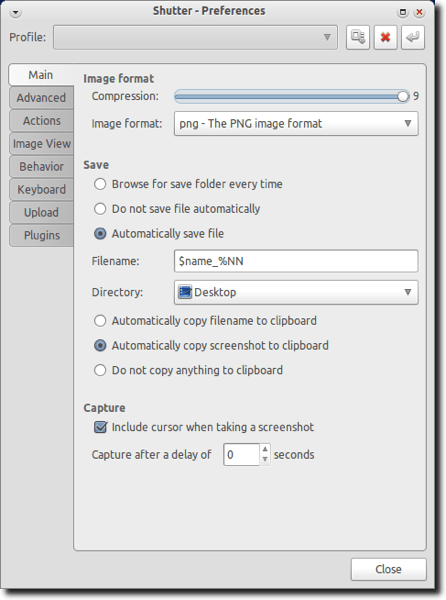 Here you can set the default image format and compression, choose behavior (should Shutter show a pop-up notification to tell you of a successful screen capture or to count backwards during a timed capture?), and to set keyboard shortcuts. In most operating systems (Windows and Linux, at least), hitting the Print Screen key on the keyboard will take a screenshot. Shutter can override this setting in Linux, which allows you to use Shutter as the default screenshot utility.
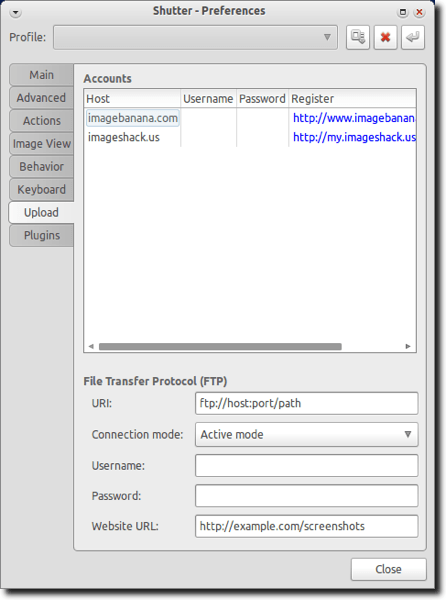
Finally, Shutter allows you to upload your screenshots, using either Imageshack or Imagebanana. Or, if you have your own FTP space, you can upload to it.
 Shutter is powerful, yet still easy to use. It has a ton of available features, but is configured so the most commonly-used are always right at your fingertips. It takes the plain screenshot utility your computer came with and replaces it with something infintely better. In short, Shutter is the best screenshot utility for Linux, and is well worth installing.
Until Shutter came along, that is. Shutter is a screenshot tool that all Linux users can take advantage of, offering not only the ability to take full Desktop screenshots, but single window, menu, tooltip and selection-based screenshots as well. Shutter can also act as a very capable screenshot editor, and when you’re done, can be used to upload your image to a variety of web hosts.
Installing Shutter
Shutter has been around long enough (the project started in 2008), that it’s likely it already exists in your Linux distribution’s software repositories. In Ubuntu, installing Shutter is as simple as typing the following command:sudo apt-get install shutter
You will also be able to find it in the Ubuntu Software Center.
sudo apt-add-repository ppa:shutter/ppa
Then, type the following command to update your software lists:
sudo apt-get update
Finally, install it, using the first command:
sudo apt-get install shutter
Your computer will now download and install Shutter; it should be ready in just a few seconds, depending on your Internet speed.
Using Shutter
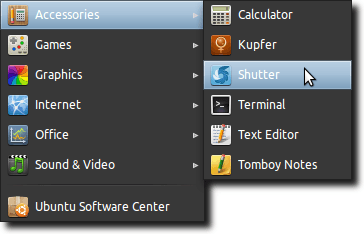
Once installed, you’ll find Shutter under Accessories, in your Applications menu.Just select the option you want from a window. If you need to do anything else (drag to select your desired area, choose a window or section, etc.), you’ll receive visual cues. For instance, this is the interface you’ll see when selecting a part of the screen to capture.
Editing Screenshots With Shutter
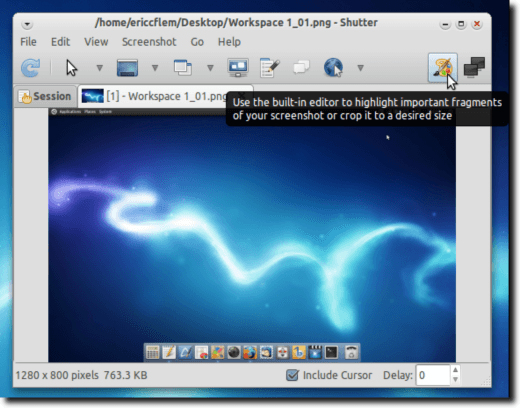
In addition to taking great screenshots, Shutter offers a wide variety of editing tools. Once you’ve taken a screenshot, the main window will appear. To edit it, click the Edit button (highlighted in the following screenshot).Shutter also offers a huge Preferences interface.
Finally, Shutter allows you to upload your screenshots, using either Imageshack or Imagebanana. Or, if you have your own FTP space, you can upload to it.
No comments:
Post a Comment