In Ubuntu, thanks to the Update Manager, it is incredibly simple to keep track of available updates. The Update Manager is scheduled to start every time your computer does, and it regularly checks to see if any new pieces of installed software have been updated. If so, it automatically starts, and shows you all available updates.
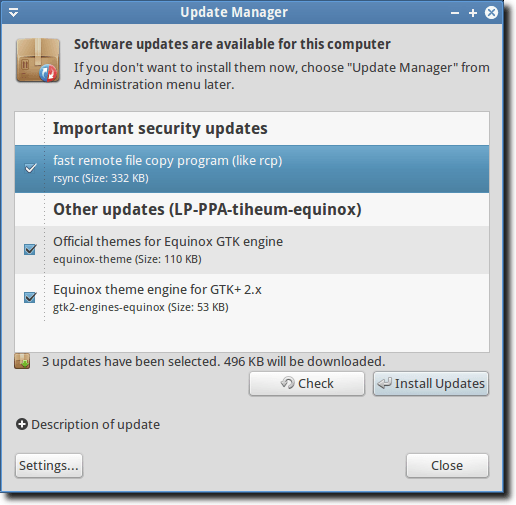
Sometimes, however, you just want to be left alone! Whether it’s because you’re not sure you want to make the upgrade (like from Maverick to Natty), or because you have a few daily builds that update every 24 hours anyway, sometimes it’s nice not to have to keep seeing the update window appear. Thankfully, it’s easy to turn off entirely, or simply change how frequently it checks for updates.
The first step is to start the Update Manager, which can be found in the System menu, under Administration.
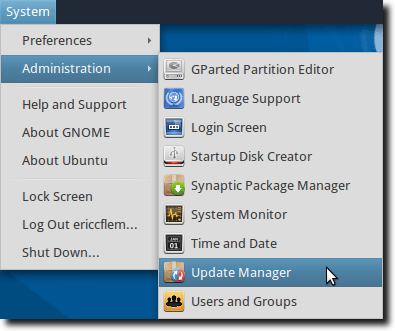
Now open the Update Manager Settings, by clicking the Settings button.

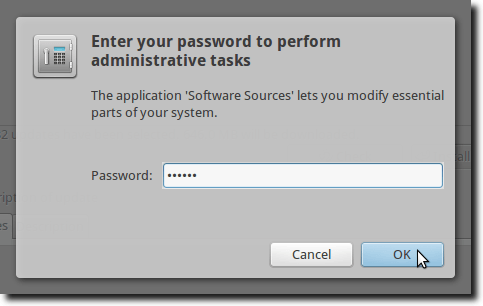
If prompted, enter your password.
The Update Manager options (also a part of the Software Sources program), will now appear.
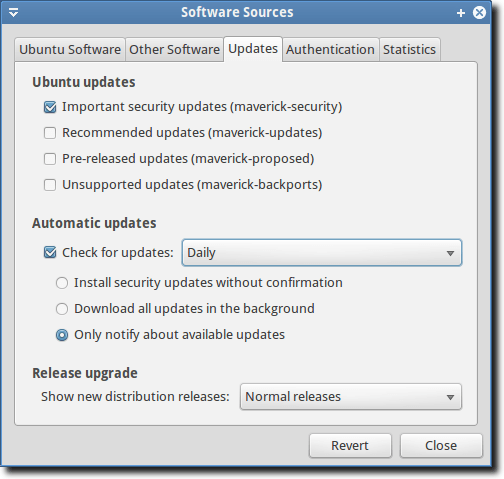
It should automatically open to the Updates tab, but if it doesn’t for some reason, click that tab.

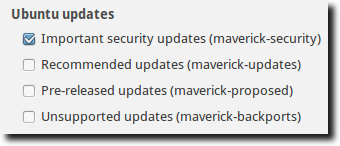
In the Ubuntu updates section, you can determine what types of updates you want to receive. If you’re happy with the software you use, and don’t want to see new versions of it, you can uncheck all the boxes, although it is adviseable to leave the Importat security updates option checked. This way, the only updates you’ll receive will be for patches that fix security holes.
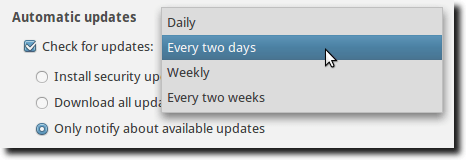
The middle section – Automatic updates – allows us to schedule exactly when the Update Manager does its thing. You have the option to completely turn off this feature, by unchecking the checkbox, or you can have it check every two days, every week, or once every two weeks.
You can also modify the behavior for dealing with Automatic Updates. If you want security updates to be installed automatically, this is an option, as is the setting to download – but not install – the updates, or the default behavior, to only be notified about available updates.
Finally, every six months Ubuntu releases a new version. By default, the Update Manager is set to tell you about it. This means probably 600 MB of downloads, and a long time spent updating. Usually this won’t be a problem.
For some people, however, the current version will always be “good enough” and for them, there might not be a compelling reason to upgrade. Maybe they want to do it themselves, when they’re ready. Or maybe they’re the type of person who only upgrades to the LTS (Long Term Support) versions. In those cases, the bottom section – Release upgrade – will be valuable.

Here you can set the Update Manager to only show new releases of Ubuntu on your terms. You can only get notifications when a new LTS release is available, or if you prefer you can receive notifications when each release comes about. Or, you can receive no notifications, and simply upgrade to the new version when you’re ready.
It’s that simple. Thanks to the flexibility and options provided by the Update Manager, you’re no longer a slave to its whims. Receive notifications of available updates on your terms.

Sometimes, however, you just want to be left alone! Whether it’s because you’re not sure you want to make the upgrade (like from Maverick to Natty), or because you have a few daily builds that update every 24 hours anyway, sometimes it’s nice not to have to keep seeing the update window appear. Thankfully, it’s easy to turn off entirely, or simply change how frequently it checks for updates.
The first step is to start the Update Manager, which can be found in the System menu, under Administration.

Now open the Update Manager Settings, by clicking the Settings button.

If prompted, enter your password.

The Update Manager options (also a part of the Software Sources program), will now appear.

It should automatically open to the Updates tab, but if it doesn’t for some reason, click that tab.

In the Ubuntu updates section, you can determine what types of updates you want to receive. If you’re happy with the software you use, and don’t want to see new versions of it, you can uncheck all the boxes, although it is adviseable to leave the Importat security updates option checked. This way, the only updates you’ll receive will be for patches that fix security holes.

The middle section – Automatic updates – allows us to schedule exactly when the Update Manager does its thing. You have the option to completely turn off this feature, by unchecking the checkbox, or you can have it check every two days, every week, or once every two weeks.

You can also modify the behavior for dealing with Automatic Updates. If you want security updates to be installed automatically, this is an option, as is the setting to download – but not install – the updates, or the default behavior, to only be notified about available updates.
Finally, every six months Ubuntu releases a new version. By default, the Update Manager is set to tell you about it. This means probably 600 MB of downloads, and a long time spent updating. Usually this won’t be a problem.
For some people, however, the current version will always be “good enough” and for them, there might not be a compelling reason to upgrade. Maybe they want to do it themselves, when they’re ready. Or maybe they’re the type of person who only upgrades to the LTS (Long Term Support) versions. In those cases, the bottom section – Release upgrade – will be valuable.

Here you can set the Update Manager to only show new releases of Ubuntu on your terms. You can only get notifications when a new LTS release is available, or if you prefer you can receive notifications when each release comes about. Or, you can receive no notifications, and simply upgrade to the new version when you’re ready.
It’s that simple. Thanks to the flexibility and options provided by the Update Manager, you’re no longer a slave to its whims. Receive notifications of available updates on your terms.


No comments:
Post a Comment