If you’re a regular Flickr user, you know that the web interface for uploading photos could use a few more features. Sure, you can select multiple items, change your privacy settings, safety level and content type, but that’s about it. What about labels? What about descriptions? Those need to wait until after you’ve uploaded your photos. With Orifli, a desktop Flickr uploader for Linux, you can do all that before beginning the upload.
Orifli, from Original Coding (the makers of Histwi, a neat utility for managing your Twitter account), is a drop-dead simple Flickr uploader that still manages to sneak in a few nice features.
As with many Linux programs, Orifli has a personal package archive (PPA) for Ubuntu, while users of other distributions, can run Orifli from the source code.
Note: this isn’t that difficult, as it turns out. Simply ensure you have Python (at least version 2.6), and GTK+ (at least version 2.12), then download the source code from here, unpack the archive, and run python orifli.py from the Terminal.
For Ubuntu users, installing Orifli is as simple as running three commands. First, open a Terminal.

Showing posts with label Linux. Show all posts
Showing posts with label Linux. Show all posts

Edit Linux Menu Entries With Alacarte
A menu entry in Linux (we’ll be using Ubuntu for this example, which uses the GNOME desktop environment), contains a few separate pieces of information. It includes the name of the program, the fact that it is an application, the location of the program executable, the location for the icon to be used in the menu, along with any comment text, and the category or categories that should be used.
That’s at the most basic. You can also include translations, so that Firefox, for example, is a “Web Browser” in English, a “Navegue por la web” in Spanish, and a “Verken het internet” in Dutch. You can provide a generic name, what type of files the program can open, whether the program is to be run inside a Terminal, and a whole lot more.
In some instances, you may want to edit a particular menu entry. Maybe you want a bit more (or less) descriptive text. For instance, you may want only “Firefox” to show up in the menu, instead of “Firefox Web Browser,” or maybe you want “Gnome Terminal,” and not “Terminal,” to appear in the Accessories menu. Regardless, it’s nice to know how to edit your menu items.
That’s at the most basic. You can also include translations, so that Firefox, for example, is a “Web Browser” in English, a “Navegue por la web” in Spanish, and a “Verken het internet” in Dutch. You can provide a generic name, what type of files the program can open, whether the program is to be run inside a Terminal, and a whole lot more.
In some instances, you may want to edit a particular menu entry. Maybe you want a bit more (or less) descriptive text. For instance, you may want only “Firefox” to show up in the menu, instead of “Firefox Web Browser,” or maybe you want “Gnome Terminal,” and not “Terminal,” to appear in the Accessories menu. Regardless, it’s nice to know how to edit your menu items.
How To Install Software in Linux
You already know that due to its open source nature, Linux comes in many colour, shapes and flavors. In fact, you too can distribute your own customized version of Linux. Different versions of Linux may offer you different benefits, but, often they pose problems due to lack of unified standard, or too many good of them. In any computing system, the best way to install an application is to compile them in the particular hardware environment where it is intended to run. But it is not possible always since you may not have required compilers and other development environment installed in your computer. Hence there remains only option to use precompiled binaries, the easily installable, and ready to run executable files to install applications. Different Linux distribution handles application installations differently. RedHat uses RPMs whereas Debian uses deb packages. Further, Linux applications are written on equally many different SDK and development environments such as GTK, QT or WxWindows and hence needed some specific files and libraries pre-installed in the system intended to run. In MS Windows platform, applications are bundled with all the dependent files and therefore they are installed along with their all required dependent dll files. That is why, in MS Windows, application installation is always a few click affair. Linux users had always wanted Linux application installation, a few mouse click affair like its windows counterpart. In Linux, till a while ago, application installation was quite a nightmare for everyone since it needs to address file dependency issues, version conflicts and all that. But, thanks to today’s advanced auto installers that do everything automatically for you, and in some cases, they seem better and easier than their counterpart in MS Windows.
Search, View, Download & Convert YouTube Videos in Linux
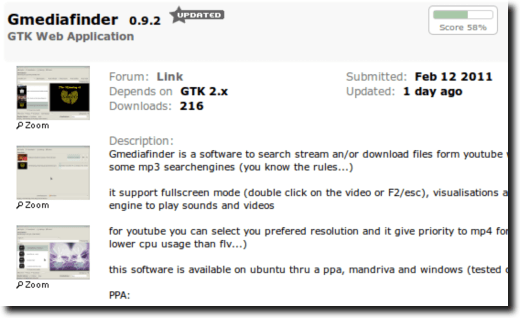 If you’re a Linux user looking for a user-friendly, simple way to search for, view, download, and even convert videos from YouTube (and more), then a project called Gmediafinder might be just what you’ve been looking for.
YouTube is a great way to find user-submitted videos, but for some people, YouTube – and any website that uses Flash – isn’t an option, either because of their computer’s speed or simply because they don’t want to install Adobe Flash.
Regardless, one of Gmediafinder’s advantages is that it does everything without using Flash.
Installing Gmediafinder is simple, for the most part. First, head over to the Gmediafinder entry at GTK-apps.
Read up on what it can do, and if it sounds like something you’d like to try out, scroll down to the download links. At the moment, you can download the source code or a package for Mandriva.
Browse Usenet in KDE Linux With KNode
 Usenet, a few years ago, before message boards and web forums, “was” message boards and forums. Long ago (back in the early 90s!), in the days before web browsers like we know them (with pictures, Flash games, embedded videos, etc.), the Internet was text-only.
 You read your email with a program like Pan, and later basic text-only clients, and you browsed the web using software such as Gopher. Usenet clients were similar to today’s message boards in that you could post messages to them, and anyone who wanted to read them was able to. People could reply to messages so that everyone could read the reply (by simply posting a message to the same group), or email the individual poster.
Taking Screenshots in Linux with Shutter
In the past, we’ve discussed different ways to take screenshots from the Terminal in Linux. Linux, whether using GNOME, KDE or Xfce, also comes with GUI methods for taking screenshots. GNOME has gnome-screenshot (called Take Screenshot in the menus), KDE has KSnapshot, and Xfce offers both the standard Screenshooter application and a panel plugin. These offerings are all well and good, but are all fairly basic. While Mac and Windows users can take advantage of any number of screenshot utilities offering more advanced features, Linux users have been left out in the cold.
Until Shutter came along, that is. Shutter is a screenshot tool that all Linux users can take advantage of, offering not only the ability to take full Desktop screenshots, but single window, menu, tooltip and selection-based screenshots as well. Shutter can also act as a very capable screenshot editor, and when you’re done, can be used to upload your image to a variety of web hosts.
Until Shutter came along, that is. Shutter is a screenshot tool that all Linux users can take advantage of, offering not only the ability to take full Desktop screenshots, but single window, menu, tooltip and selection-based screenshots as well. Shutter can also act as a very capable screenshot editor, and when you’re done, can be used to upload your image to a variety of web hosts.
Batch Rename Files In Linux With Thunar
At times it becomes necessary to rename a large number of files at once. Maybe it’s because you just downloaded a batch of photos from your digital camera, or maybe you realized a lot of your MP3 files weren’t named correctly.
Regardless of what and why, it can be incredibly tedious to have to rename item after item, especially if you’re performing the same modifications to each file. There are stand-alone batch renaming utilities available for Linux, but if you use Xfce (or simply don’t mind installing a second file manager on your System), Thunar – the default file manager in Xfce – has a fantastic batch renaming utility built-in.

Regardless of what and why, it can be incredibly tedious to have to rename item after item, especially if you’re performing the same modifications to each file. There are stand-alone batch renaming utilities available for Linux, but if you use Xfce (or simply don’t mind installing a second file manager on your System), Thunar – the default file manager in Xfce – has a fantastic batch renaming utility built-in.
Install Thunar and Thunar Bulk Rename
The first step is to install Thunar. To do this, let’s open up a Terminal window.Give Your Ubuntu Installation Full Multimedia Support
Adding support for a wide range of formats, codecs and media in Linux can be a bit daunting. There are numerous playback engines (Xine, MPlayer, GStreamer, VLC), which can be confusing. And since Linux – by its very nature – favors open solutions, you often have an operating system that often doesn’t have much out-of-the-box support for some common multimedia formats.
What formats are we talking about? Well, a default installation of Ubuntu can’t play any of your MP3s. It can’t play videos on Hulu or YouTube. It can’t play the Divx file you downloaded off the Internet, and it can’t play your store-bought DVD disks. Linux can play them, but because some are restricted by patent or licensing issues (which vary from country to country), many Linux distributions simply forego support in any of their versions. This can be both tedious and annoying.
In Ubuntu, we can do this first part graphically (although the Terminal will be far superior for actually installing the rest of the software), by going to the Software Sources preference pane. You can find Software Sources in the System Menu, then the Administration submenu.
What formats are we talking about? Well, a default installation of Ubuntu can’t play any of your MP3s. It can’t play videos on Hulu or YouTube. It can’t play the Divx file you downloaded off the Internet, and it can’t play your store-bought DVD disks. Linux can play them, but because some are restricted by patent or licensing issues (which vary from country to country), many Linux distributions simply forego support in any of their versions. This can be both tedious and annoying.
Setting Up Our Repositories
Ubuntu uses four basic repositories: main, restricted, universe and multiverse. Each houses software with either different levels of support from Ubuntu, or different licenses. Since a lot of the software we’ll be installing is in the universe and multiverse repositories (which are turned off by default), we’ll need to turn them on.In Ubuntu, we can do this first part graphically (although the Terminal will be far superior for actually installing the rest of the software), by going to the Software Sources preference pane. You can find Software Sources in the System Menu, then the Administration submenu.
Launch Linux Applications and Documents With Synapse
One of the traditionally popular application and file launchers for Mac OS X is called Quicksilver. Quicksilver, like Launchy (originally for Windows but now also available for Linux), is a keyboard launcher. To use Quicksilver, you would simply type Apple-Space, which called up its simple interface. Then you just started typing the name of the application you wanted to launch.
Quicksilver would then search through your installed programs and as you typed show you the results, until the one you wanted to use appeared in the list. You could also open documents, manipulate files, and even perform more complicated tasks. It was incredibly powerful.
As a bonus, the more you used Quicksilver, the “smarter” it got, as it learned which applications you used most often. So, when you wanted to use Firefox, it would eventually place Firefox at the top of the list (instead of Finder) after only having typed the first letter.
Linux has a program called Gnome DO, which looks and behaves almost exactly like Quicksilver. Development eventually slowed on Gnome DO, however, and then a complete rewrite was promised. That
rewrite seems to still be in the future, but a new launcher, called Synapse, may replace it for many people.
Quicksilver would then search through your installed programs and as you typed show you the results, until the one you wanted to use appeared in the list. You could also open documents, manipulate files, and even perform more complicated tasks. It was incredibly powerful.
As a bonus, the more you used Quicksilver, the “smarter” it got, as it learned which applications you used most often. So, when you wanted to use Firefox, it would eventually place Firefox at the top of the list (instead of Finder) after only having typed the first letter.
Linux has a program called Gnome DO, which looks and behaves almost exactly like Quicksilver. Development eventually slowed on Gnome DO, however, and then a complete rewrite was promised. That
rewrite seems to still be in the future, but a new launcher, called Synapse, may replace it for many people.
Easily Record System Audio in Linux With Audio Recorder
Like a lot of applications these days, Audio Recorder has a personal package archive (PPA), although that is for Ubuntu users only. To use it, first open a Terminal.

Delete Failed Thumbnail Previews in GNOME Linux
When using Ubuntu (which uses the GNOME desktop), and most similar Linux distributions, you’ll notice that video files and photos will show a small thumbnail image of the actual file, instead of just a generic item.
So do text files and some other files, such as fonts. This is helpful for quickly identifying, for instance, that single wallpaper you want to use, but that you aren’t sure of the name. Being able to glance at it and identify it by sight saves a lot of time which would otherwise be spent paging through possibly hundreds of images.
Sometimes, however, for whatever reason, something goes wrong and you end up with files that don’t have thumbnail images, but instead have generic file icons.

So do text files and some other files, such as fonts. This is helpful for quickly identifying, for instance, that single wallpaper you want to use, but that you aren’t sure of the name. Being able to glance at it and identify it by sight saves a lot of time which would otherwise be spent paging through possibly hundreds of images.
Sometimes, however, for whatever reason, something goes wrong and you end up with files that don’t have thumbnail images, but instead have generic file icons.
Get the Path to an Icon in Linux with a Nautilus Script
Linux is nothing if not customizable. And this is not to say that the customizability comes with a price (although who hasn’t spent far too much time trying to figure out exactly which wallpaper out of a pack of 300 would be perfect for a favorite combination of themes and icons?), but sometimes there’s just so much you can change that you begin to lose track of where things are! “Did this icon set come with the theme?” “Where did I download this?” If I delete this theme, will the wallpaper disappear as well?”
This article doesn’t have the answers to all those questions, but it will help you with one specific task: finding an icon.
GNOME Linux uses Nautilus as its default file manager, and Nautilus can use scripts. Scripts are little bits of code, tiny programs if you will, which can be accessed instantly from the scripts folder in your right-click contextual menu. They’re almost always intended to act upon whatever you had highlighted when you clicked. So, for instance, if you download a script that can convert music from one format to another, you would right-click on a music file (MP3, AAC, WMA, etc.), and the script would assume you wanted to convert that item.
The where-is-this-icon script works the same. Right-click on any folder, file or desktop launcher, and it will give you the direct path to where the icon that item uses is stored on your computer. This is great for when you see an icon you like, and might want to use with another file, but just don’t have a real good idea where the icon is located.

Once you’re there, simply scroll down to the download link and click it.

You’ll get the typical “wait 3 seconds” screen, and then the download should begin.

The download, however, may not simply download as you’d expect; the script itself might load in your web browser window.

If that’s the case, just save the page as plain text. Go to the File menu of your browser (in Firefox, at least), and click the Save Page As option.

Then just choose a download location, and you’re done.

When the Properties window appears, select the Permissions Tab.

Then, at the bottom, make sure the Allow executing file as program option is checked.

That accomplished, close the Properties window and open a Terminal; we need to properly install the script.

Type the following:
mv /home/username/Desktop/where-is-this-icon /home/username/.gnome2/nautilus-scripts/
Note: make sure to substitute the actual path to the script (where you saved it), as well as replace “username” with your own username. Also, if the nautilus-scripts folder doesn’t exist yet, this command will create it.
Now that we have the script installed, it’s fairly trivial to use. As stated earlier, the script can show us the path to the icon for a file, folder or launcher. Here’s what it looks like finding a launcher’s icon. Right-click the item, then navigate down to the scripts folder, and choose the where-is-this-icon script.

A new window should pop up, informing you that the item has no set icon (as is sometimes the case), or the path to the icon, as shown below:

It’s that simple! The where-is-this-icon script is truly a one-trick pony. It doesn’t do anything more than this, and probably never will. But it is certainly a nice time-saver for those moments when you love an icon… but you just don’t know where it’s located. With where-is-this-icon installed, now you know!
This article doesn’t have the answers to all those questions, but it will help you with one specific task: finding an icon.
GNOME Linux uses Nautilus as its default file manager, and Nautilus can use scripts. Scripts are little bits of code, tiny programs if you will, which can be accessed instantly from the scripts folder in your right-click contextual menu. They’re almost always intended to act upon whatever you had highlighted when you clicked. So, for instance, if you download a script that can convert music from one format to another, you would right-click on a music file (MP3, AAC, WMA, etc.), and the script would assume you wanted to convert that item.
The where-is-this-icon script works the same. Right-click on any folder, file or desktop launcher, and it will give you the direct path to where the icon that item uses is stored on your computer. This is great for when you see an icon you like, and might want to use with another file, but just don’t have a real good idea where the icon is located.
Downloading The Script
First you’ll need to head to the script’s home page on gtk-apps.org; the direct link is right here.Once you’re there, simply scroll down to the download link and click it.
You’ll get the typical “wait 3 seconds” screen, and then the download should begin.
The download, however, may not simply download as you’d expect; the script itself might load in your web browser window.
If that’s the case, just save the page as plain text. Go to the File menu of your browser (in Firefox, at least), and click the Save Page As option.
Then just choose a download location, and you’re done.
Installing and Using The Script
Once the script has downloaded, locate it on your computer and right-click it. Choose the Properties option from the contextual menu.When the Properties window appears, select the Permissions Tab.
Then, at the bottom, make sure the Allow executing file as program option is checked.
That accomplished, close the Properties window and open a Terminal; we need to properly install the script.
Type the following:
mv /home/username/Desktop/where-is-this-icon /home/username/.gnome2/nautilus-scripts/
Note: make sure to substitute the actual path to the script (where you saved it), as well as replace “username” with your own username. Also, if the nautilus-scripts folder doesn’t exist yet, this command will create it.
Now that we have the script installed, it’s fairly trivial to use. As stated earlier, the script can show us the path to the icon for a file, folder or launcher. Here’s what it looks like finding a launcher’s icon. Right-click the item, then navigate down to the scripts folder, and choose the where-is-this-icon script.
A new window should pop up, informing you that the item has no set icon (as is sometimes the case), or the path to the icon, as shown below:
It’s that simple! The where-is-this-icon script is truly a one-trick pony. It doesn’t do anything more than this, and probably never will. But it is certainly a nice time-saver for those moments when you love an icon… but you just don’t know where it’s located. With where-is-this-icon installed, now you know!
Reinstall Your Ubuntu Apps After A Fresh Reinstall
If you’re the type of person who is constantly installing, modifying, deleting and reinstalling a lot of different operating systems, then you know the pain of having to download and install the programs you want to use, each time you do this.
The drill is simple, but tedious: wipe the hard drive, install the new operating system, download all the programs you use and install them. Then, days or weeks or months later, do it all over again when you find a new operating system you want to use!
If you use Ubuntu, however, there is a simple solution to this problem. You’ll still need to download and install everything “extra” you had on your previous installation, but you won’t need to remember exactly what it was.
You can automate the process with just a few clicks. This is thanks to Synaptic Package Manager, which offers the ability to export lists of packages currently installed on your computer; these lists are called Markings. It’s a simple process, but one that should save you a lot of time.
The drill is simple, but tedious: wipe the hard drive, install the new operating system, download all the programs you use and install them. Then, days or weeks or months later, do it all over again when you find a new operating system you want to use!
If you use Ubuntu, however, there is a simple solution to this problem. You’ll still need to download and install everything “extra” you had on your previous installation, but you won’t need to remember exactly what it was.
You can automate the process with just a few clicks. This is thanks to Synaptic Package Manager, which offers the ability to export lists of packages currently installed on your computer; these lists are called Markings. It’s a simple process, but one that should save you a lot of time.
Use SystemClean to Rid Your Linux System of Unused Files
The first step in installation is to head over to Gnomefiles.org and search for SystemClean. Here is the direct link.

Use MSStyles to Theme Wine Applications In Linux
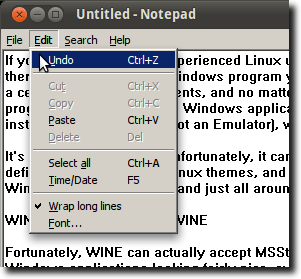 If you’re a new, or even experienced Linux user, chances are pretty good that no matter how hard you try, there is always that one Windows program you need. Maybe it’s for work. Often a business will mandate a certain format for documents, and no matter how good it is, or how comfortable you might be in a native Linux program, you still need the Windows application. So instead of installing Windows alongside Linux, you installed Wine (Wine Is Not an Emulator), which allows you to run Windows programs from within Linux.
Upgrade Ubuntu Using the Alternate CD
The Alternate CD is different from the standard Desktop CD. The standard CD allows users to try out Ubuntu without installing, while the Alternate CD only offers a text-based installer. To find it, go to the Ubuntu download page.

New in Ubuntu Natty Part 2 – Lenses, Shortcuts & More
Lenses, as mentioned in part one of this series, are a specialized way of viewing your applications and documents. By default, there are two lenses already on the Unity launcher; they’re located near the bottom, just above the trash can. The first is for Applications, the other for Files & Folders. Clicking on one of them reveals that lens in the Dash.

Installing flash player in Ubuntu
If you have been following my series of posts on how to install Ubuntu on Microsoft Virtual PC 2007 then you most likely have Ubuntu up and running, but have you wondered how to install applications on Ubuntu? It is quite different than the way we install applications in window.
Go to youtube or any other website that requires a flash player and you will see that you need to install the flash player in order to play the videos. Go how to you install the flash player in Ubuntu?
Simple.
Close the browser, and go to Applications, Accessories, Terminal and type the following command:
$ sudo apt-get install flashplugin-nonfree
After a few seconds the flash player should be installed on your computer. Return to youtube or any other website that requires a flash player, and the videos should display find now.
Go to youtube or any other website that requires a flash player and you will see that you need to install the flash player in order to play the videos. Go how to you install the flash player in Ubuntu?
Simple.
Close the browser, and go to Applications, Accessories, Terminal and type the following command:
$ sudo apt-get install flashplugin-nonfree
After a few seconds the flash player should be installed on your computer. Return to youtube or any other website that requires a flash player, and the videos should display find now.
Change Ubuntu’s Update Alerts for Fewer Distractions
In Ubuntu, thanks to the Update Manager, it is incredibly simple to keep track of available updates. The Update Manager is scheduled to start every time your computer does, and it regularly checks to see if any new pieces of installed software have been updated. If so, it automatically starts, and shows you all available updates.

Understanding the “top” command in Linux
If your computer seems to grind to a halt every once in a while, or your fans seem to be running often, and loudly, it’s a good idea to see if any particular program is causing the problem, or if your computer maybe just isn’t up to the tasks you’ve been giving it.
Maybe Firefox – with tons of tabs all running Flash games and YouTube videos – is the culprit, or maybe you have a “stuck” process from a program you thought you closed. The causes can be varied, but there’s one program in Linux that can at the very least give you a glimpse into what’s happening.
That is the top command. Using top is pretty simple. First, open a Terminal.

Maybe Firefox – with tons of tabs all running Flash games and YouTube videos – is the culprit, or maybe you have a “stuck” process from a program you thought you closed. The causes can be varied, but there’s one program in Linux that can at the very least give you a glimpse into what’s happening.
That is the top command. Using top is pretty simple. First, open a Terminal.
Subscribe to:
Posts (Atom)