With Pulse, you can rotate wallpaper every few minutes by specifying a keyword and allowing the small program to run in the background.
Showing posts with label windows. Show all posts
Rotate Wallpaper by Keyword in Windows
With Pulse, you can rotate wallpaper every few minutes by specifying a keyword and allowing the small program to run in the background.
Prevent Changes to Taskbar and Start Menu Settings in Windows 7
Administrators who deal with many users on a Windows 7 PC often have to respond to minor issues brought on by the users themselves. One area that gets a lot of users in trouble is a change to the Taskbar or Start menu that the user can’t remember how to undo. Using a group policy option, you can prevent users from making changes to the Taskbar and Start menu and ensure that all users have the same interface in Windows 7.
The Taskbar and Start menu are the primary interfaces in any version of Windows. Changes to these interfaces often confuse people more than it helps them. When users are allowed to make changes to the Taskbar and Start menu, administrators open themselves up to minor and annoying service tickets that take up time and cost companies money.
Luckily, a quick policy change prevents all users of a Windows 7 PC from making changes to both the Taskbar and Start menu. Primarily, users will no longer be able to right click on either interface and click the Properties option from the menu. A nice message appears instead telling the users that a setting prevents that action.
Why Prevent Changes to the Taskbar and Start Menu?
One of the most frustrating aspects to Windows 7 administration is fixing problems created when users unnecessarily start poking around in the operating system’s features and options. There are still some people who want the operating system to look and function the way it did 15 years ago. When they try to make that happen, users often make changes they can’t undo.The Taskbar and Start menu are the primary interfaces in any version of Windows. Changes to these interfaces often confuse people more than it helps them. When users are allowed to make changes to the Taskbar and Start menu, administrators open themselves up to minor and annoying service tickets that take up time and cost companies money.
Luckily, a quick policy change prevents all users of a Windows 7 PC from making changes to both the Taskbar and Start menu. Primarily, users will no longer be able to right click on either interface and click the Properties option from the menu. A nice message appears instead telling the users that a setting prevents that action.
Change, Add and Remove Values for File Properties in Windows 7
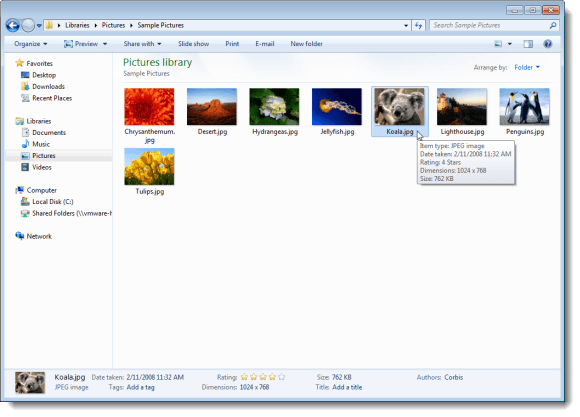
When you select a file in Windows 7, properties (or details) about the selected file, such as the author of the file, the size of the file, any tags associated with the file, and the date of the file are displayed. The properties available for a file differ depending on the type of file. For example, the Rating property is available for image files and music files, but not for text files. File properties are displayed in a Details pane at the bottom of the Windows Explorer window.

Add the Windows 8 Taskbar User Picture Tile to Windows 7
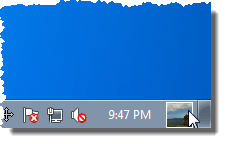
Microsoft is updating the Taskbar in the upcoming Windows 8 operating system to include a small user picture tile in the notification area of the Taskbar.

When you click the user picture tile, a popup menu displays which user is currently logged in and provides quick access to your user account settings directly from the Taskbar. We found a free tool, called Taskbar UserTile, that allows you to add the user picture tile with similar functionality to your Taskbar in Windows 7.
Easily and Quickly Optimize Windows XP Using a Free Tool
Are you still using Windows XP? Is it slowing down? We found a quick and easy way to optimize Windows XP using a tool called Quick XP Optimizer. It improves the performance of your system and applications and speeds up the boot up and shut down processes of Windows XP. This free tool speeds up the boot up and shut down of Windows, makes applications load quicker and run smoother, and speeds up browsing of your files and browsing on the internet. Quick XP Optimizer also allows you to easily clean up your hard drive and remove unnecessary files in Windows. And you don’t have to know anything about registry and system settings!
NOTE: Quick XP Optimizer is a safe program to run; we had no problems with it. However, it’s always a good idea to play it safe. We recommend you create a system restore point before optimizing your system with this tool.
Download Quick XP Optimizer from
Save a List of Running Processes to a Text File in Windows
This procedure also works in Windows XP and Windows Vista.
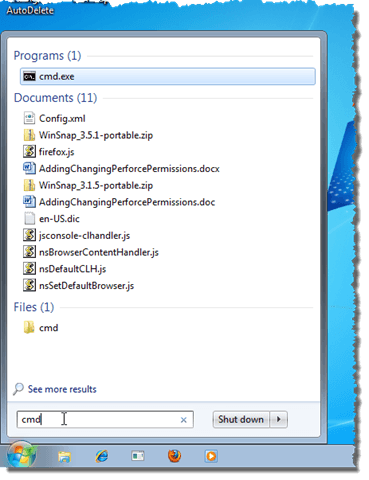
To generate a list of running processes, open the Command Prompt as Administrator. To do this in Windows 7 or Windows Vista, enter “cmd” (without the quotes) in the Search Programs and Files box on the Start menu. The cmd.exe program should automatically be highlighted in the Programs section of the results. Press Ctrl + Shift + Enter to open cmd.exe as Administrator.
You can also open the Command Prompt as Administrator in Windows 7 or Windows Vista by opening All Programs | Accessories on the Start menu. Right-click on the Command Prompt shortcut and select Run as administrator from the popup menu.
How to Use XP Mode in Windows 7
However, Windows 7 can have some problems with backwards compatibility… which is to be expected with any new operating system. Microsoft anticipated this and decided to add XP Mode to Windows 7.
XP Mode allows you to run Windows XP inside a virtual machine within Windows 7. In turn, you will be able to run older applications and programs if need be. The following tutorial will guide you through adding XP mode to your Windows 7 installation.
Before you get started installing XP Mode, you should first check to see if your computer supports virtualization. Use this tool, directly from Microsoft, to check your computer’s compatibility.
Generate a List of Installed Programs in Windows
If you need to reinstall Windows 7, Windows Vista, or Windows XP for any reason, you may want a list of the programs you have installed on your system so you can easily know what programs you need to reinstall once you have installed Windows again.
NOTE: This procedure shows you how to generate a list of installed programs only. The license keys and serial numbers for the programs are not included in the list. To generate a list of license keys and serials numbers for your installed programs, see our post, Recover License Keys for Installed Software.
To generate the list of installed programs, open the Command Prompt as Administrator. To do this in Windows 7 or Windows Vista, enter “cmd” (without the quotes) in the Search Programs and Files box on the Start menu. The cmd.exe program should automatically be highlighted in the Programs section of the results. Press Ctrl + Shift + Enter to open cmd.exe as Administrator.
NOTE: This procedure shows you how to generate a list of installed programs only. The license keys and serial numbers for the programs are not included in the list. To generate a list of license keys and serials numbers for your installed programs, see our post, Recover License Keys for Installed Software.
To generate the list of installed programs, open the Command Prompt as Administrator. To do this in Windows 7 or Windows Vista, enter “cmd” (without the quotes) in the Search Programs and Files box on the Start menu. The cmd.exe program should automatically be highlighted in the Programs section of the results. Press Ctrl + Shift + Enter to open cmd.exe as Administrator.
Prevent Users from Deleting Printers in Windows 7
To make this change, you need to log in to Windows 7 using an account that has administrative privileges. Then, click on Start>Run or hold down the Windows key on your keyboard and press the R key to open the Run dialogue box. With the Run box open, type in gpedit.msc and click the OK button.
You are now looking at the Local Group Policy Editor. In the left hand pane, locate the policies at User Configuration>Administrative Templates>Control Panel>Printers. Be sure to click on the Printers folder itself.

You are now looking at the Local Group Policy Editor. In the left hand pane, locate the policies at User Configuration>Administrative Templates>Control Panel>Printers. Be sure to click on the Printers folder itself.
Show File Extensions in Windows
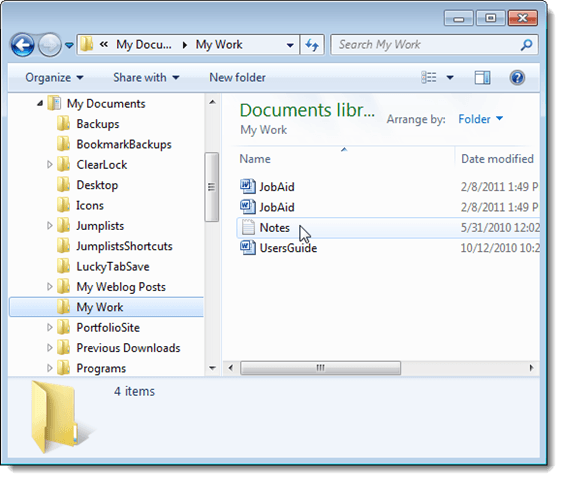
If you have just installed Windows on your computer, you may have noticed that you don’t see extensions on filenames. They are not visible by default. This post shows you how to show the extensions on filenames in Windows XP, Windows Vista, and Windows 7. This may seem like a simple task, but some of you may have forgotten where the setting is. You may be able to tell the type of file from the icon on the file, but it is not always obvious. For example, we have two copies of the JobAid file, but one is a Word 2003 (.doc) file and one is a Word 2007/2010 (.docx) file. By just looking at the files, you can’t easily tell the difference. However, you can easily show the file extensions to find out which file is which.

Subscribe to:
Posts (Atom)